After a flood, addressing structural drying is essential to prevent mold and further damage. You need to assess safety first and identify moisture sources. Efficient water removal is vital, followed by the use of industrial-grade dehumidifiers and air movers to enhance airflow. Monitoring humidity levels throughout the process is key. But what about those hidden moisture pockets that can lead to future problems? Let’s explore the top techniques for effective structural drying.
Key Takeaways
- Prioritize safety by assessing hazards and using protective gear before entering flood-affected areas.
- Remove standing water using submersible pumps and wet/dry vacuums to facilitate drying.
- Utilize industrial-grade dehumidifiers strategically to control humidity levels and prevent mold growth.
- Monitor humidity with hygrometers to ensure levels remain below 60% for effective drying.
- Conduct thorough inspections for hidden moisture and deploy air movers to enhance evaporation.
Assessing Water Damage and Safety Risks
When evaluating water damage and safety risks after flooding, it’s crucial to prioritize your safety before entering the affected area. Check local advisories for flood warnings and avoid entering if conditions are unsafe.
Analyzing water damage requires a systematic approach. Begin by identifying the source of the water, whether it’s from natural flooding or a plumbing failure.
Inspect the area for hazards like electrical risks and structural instability. Use protective gear, such as gloves and boots, to minimize exposure to contaminants.
During your damage assessment, look for signs of mold, which can develop quickly in moist environments. Document the extent of the damage, taking photos for insurance claims.
This thorough evaluation helps you understand the impact on your property and ensures you’re adhering to water safety standards. By being proactive, you can safeguard your health and begin the remediation process effectively.
Removing Standing Water Efficiently
To effectively remove standing water after flooding, start by using a submersible pump for large volumes of water. These pumps efficiently extract water, making them essential in your water removal techniques.
Once you’ve tackled the bulk of the water, you can switch to wet/dry vacuums for smaller areas and hard-to-reach spots.
Make sure to prioritize safety by wearing protective gear and ensuring electrical systems are secure. As you work through the flood cleanup strategies, consider the layout of the space to optimize your efforts—always pump water from the highest point first to enhance drainage.
After initial removal, allow airflow to help speed up the drying process and prevent mold growth.
Utilizing Industrial-Grade Dehumidifiers
After removing standing water, the next step in effective flood recovery involves utilizing industrial-grade dehumidifiers. These units are vital for controlling humidity levels and preventing mold growth.
You’ll find various dehumidifier types, such as refrigerant and desiccant models, each suited for different environments. Refrigerant dehumidifiers work best in warmer conditions, while desiccant types excel in cooler or low-humidity settings.
When selecting a dehumidifier, pay attention to efficiency ratings. Higher ratings indicate better performance and energy efficiency, which can save you money in the long run.
It’s important to size the dehumidifier correctly for your space; too small won’t do the job, and too large can waste energy. By strategically placing these dehumidifiers throughout the affected area, you’ll expedite the drying process and ensure a thorough recovery.
Your proactive approach will greatly reduce further damage and foster a healthier environment.
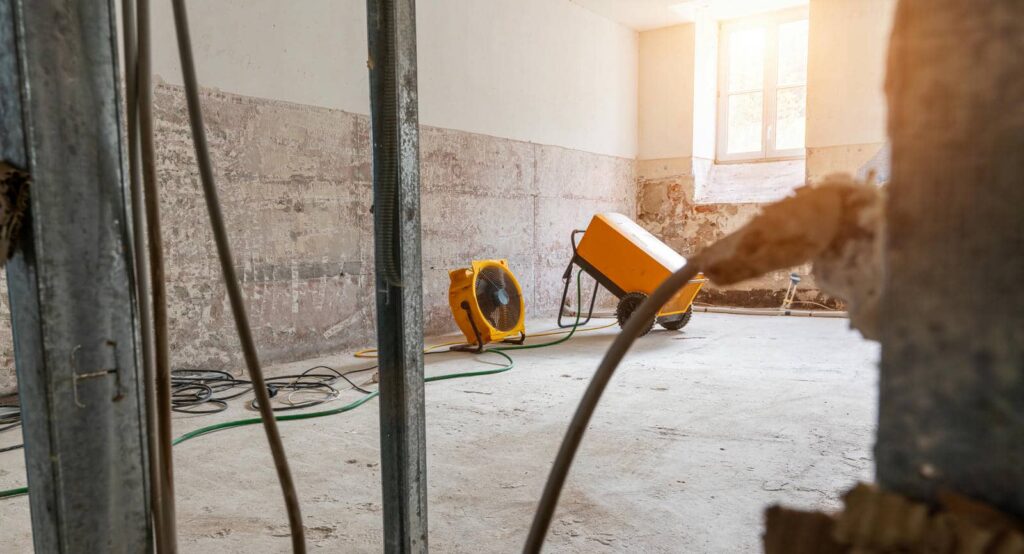
Implementing Air Movers for Enhanced Evaporation
While dehumidifiers are essential for controlling moisture, implementing air movers greatly enhances evaporation and accelerates the drying process. By strategically positioning these devices, you can achieve ideal airflow optimization throughout the affected area.
Air movers create a directed flow of air that increases the rate of moisture evaporation from surfaces, which is vital after flooding.
To maximize efficiency, consider using a combination of high-velocity and low-velocity air movers. High-velocity units are effective for hard surfaces, while low-velocity models work best for delicate materials.
Adjusting the angle and positioning of the air movers can further enhance evaporation techniques, ensuring that every corner of the space is adequately addressed.
Regularly monitoring the moisture levels will help you determine the effectiveness of your setup. This proactive approach speeds up the drying process and supports a healthier environment by preventing mold growth.
Your efforts in implementing these techniques will make a significant difference.
Applying Heat to Accelerate Drying
To speed up the drying process, you can effectively use heat sources like portable heaters or infrared lamps.
By maintaining controlled temperature settings, you’ll create an ideal environment for moisture evaporation.
This method accelerates drying and helps prevent secondary damage from prolonged moisture exposure.
Heat Sources Utilization
Utilizing heat sources effectively can greatly speed up the drying process after flooding. By applying the right drying methods, you can enhance evaporation rates and minimize damage.
Portable heaters, infrared lamps, and heat mats are excellent options to take into account. They help maintain a consistent temperature, ensuring materials dry evenly.
When using heat sources, remember to monitor humidity levels, as excessive heat can lead to further complications. Position heaters strategically to maximize airflow and target damp areas directly.
Combining heat sources with dehumidifiers creates an ideal drying environment, allowing moisture to escape more rapidly.
Always prioritize safety and follow manufacturer guidelines to prevent overheating or fire hazards. With the right approach, you’ll expedite recovery and restore your space effectively.
Controlled Temperature Settings
When you apply controlled temperature settings during the drying process, you can markedly enhance moisture removal efficiency. By strategically raising the ambient temperature, you encourage faster evaporation of water from surfaces.
Effective temperature control accelerates drying and helps prevent secondary damage, such as mold growth.
Aim for a consistent temperature range, typically between 70°F and 90°F, depending on the materials involved. Use thermometers and hygrometers to monitor conditions and adjust settings accordingly.
Combining heat with proper ventilation further optimizes drying efficiency, ensuring moisture is effectively expelled from the area.
Monitoring Humidity Levels Throughout the Process
As you commence the structural drying process after flooding, monitoring humidity levels becomes essential to prevent further damage.
Accurate humidity monitoring helps you gauge the effectiveness of your drying efforts and ensures you’re not overlooking hidden moisture. By using hygrometers or moisture meters, you can track humidity levels in real-time, allowing you to adjust your drying strategy as needed.
Regular moisture tracking aids in identifying areas that need more attention and helps in determining when conditions are safe for restoration work to begin.
Aim for a relative humidity level below 60% to discourage mold growth and promote effective drying.
Inspecting and Treating Hidden Moisture Areas
When you inspect for hidden moisture areas, start by identifying potential sources, such as leaks or trapped water.
Utilize moisture detection tools to pinpoint problem areas that may not be visible.
Once located, promptly address any hidden water pockets to prevent mold growth and structural damage.
Identify Potential Moisture Sources
Identifying potential moisture sources is essential for effective structural drying after flooding. Start by inspecting areas where water may have infiltrated, such as basements, crawl spaces, and behind walls.
Moisture mapping can help pinpoint hidden moisture pockets that mightn’t be immediately visible. Pay close attention to plumbing leaks, roof damage, and areas with poor drainage—these are common culprits.
While identifying water, use your senses; look for discoloration, mold growth, or musty odors that indicate moisture presence.
Don’t forget to check appliances and HVAC systems, as they can also harbor hidden moisture. By thoroughly evaluating these areas, you can create a targeted plan to address all potential moisture sources, ensuring a more effective and thorough drying process.
Use Moisture Detection Tools
After pinpointing potential moisture sources, utilizing moisture detection tools becomes imperative for inspecting and treating hidden moisture areas.
You’ll want to employ moisture mapping techniques to identify high-risk zones effectively. Using infrared cameras, you can visually assess temperature variations, highlighting moisture-laden areas that may not be immediately visible.
Additionally, moisture meters allow you to quantify moisture levels in walls, floors, and other materials. These detection methods help you ensure no hidden pockets of water remain, which can lead to mold growth and structural damage.
Address Hidden Water Pockets
Although moisture detection tools are essential for locating hidden water pockets, addressing these areas requires a systematic approach to ensure thorough drying.
Here are key steps you can take:
Inspect behind walls and under flooring: Use thermal imaging to identify hidden moisture zones.
Check insulation: Wet insulation can trap hidden moisture, so remove and replace it as needed.
Utilize dehumidifiers: Deploy them in affected areas to expedite drying and reduce humidity levels.
Monitor progress: Regularly check moisture levels with your detection tools to confirm all hidden moisture is eliminated.
Frequently Asked Questions
How Long Does Structural Drying Typically Take After Flooding?
Structural drying typically takes 3 to 7 days, depending on moisture levels and materials involved. You’ll want to monitor drying duration closely to ensure effective moisture removal and prevent further damage to your property.
What Personal Protective Equipment Should I Use During the Drying Process?
During the drying process, you should wear protective gloves and safety goggles to safeguard against hazardous materials and contaminants. Staying safe while effectively managing the situation builds confidence and ensures a healthier environment for everyone involved.
Can I Use Household Fans Instead of Industrial Air Movers?
You can use household fans, but their efficiency is limited compared to industrial air movers. Industrial air movers provide stronger airflow, promoting faster drying and reducing the risk of mold, making them the better choice.
How Can I Prevent Mold Growth During the Drying Process?
Think of mold as an unwelcome guest. To prevent it, use mold prevention strategies like dehumidifiers and humidity control methods to keep moisture levels low. Regularly monitor conditions and act quickly to stay ahead.
Should I Keep Windows Open While Drying My Home?
You shouldn’t keep windows open while drying your home. It can lead to higher humidity levels, hindering drying efforts. Instead, focus on controlled ventilation benefits to maintain ideal humidity control and promote effective drying.
Recap
So, you’ve tackled the flood like a pro and dried out your space. Congratulations! Just remember, ignoring hidden moisture is like playing hide-and-seek with mold—spoiler alert: mold always wins! Keep monitoring those humidity levels and check those sneaky spots. After all, who wouldn’t want a surprise mold party in their home? Stick to the techniques outlined here, and you’ll keep your space mold-free, or at least prevent it from becoming an unwelcome guest!