
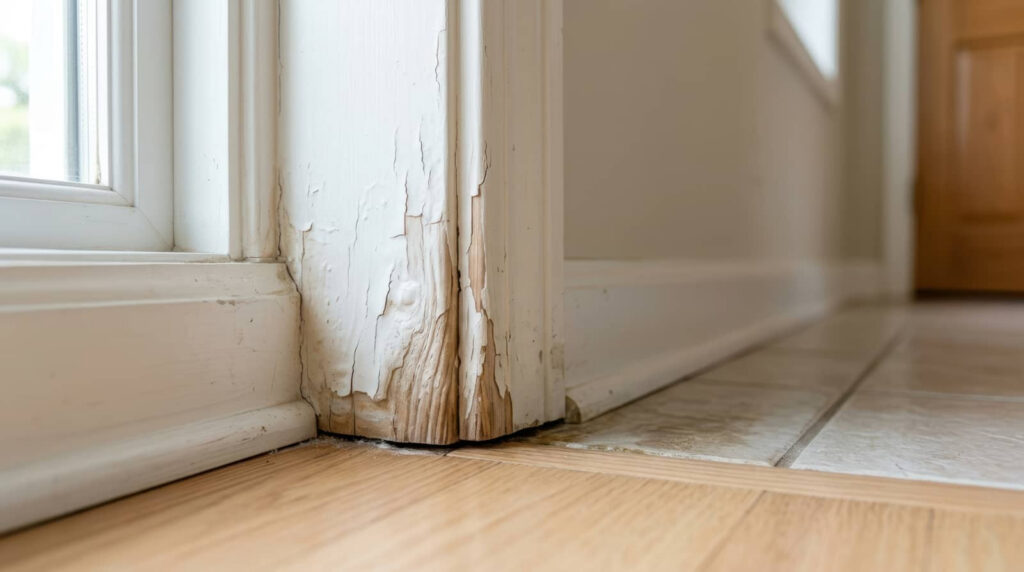
Overhead Leak Damage can continue even when the ceiling looks dry, because trapped moisture may remain hidden behind it. You need to stop the leak, check for hidden water in framing and insulation, then use targeted drying so airflow and dehumidification work together. Moisture meters help determine when materials are truly dry, and wet insulation may need removal. Missing these steps can allow concealed damage to spread before you notice.
Key Takeaways
- Stop the leak immediately and contain water to prevent further ceiling and wall damage.
- Inspect ceilings, wall cavities, baseboards, and flooring for hidden moisture and structural weakening.
- Remove wet insulation and damaged materials that cannot dry safely in place.
- Use air movers and dehumidifiers to create targeted structural drying and monitor moisture readings.
- Continue testing until moisture levels stabilize, then check for mold, staining, or remaining damage.
What Structural Drying Does After a Ceiling Leak?
Structural drying stops hidden moisture from lingering after a ceiling leak by removing water from drywall, insulation, framing, and nearby finishes before it can lead to swelling, staining, or mold growth.
You get a focused damage assessment that shows where moisture absorption has occurred and which materials still need treatment. Technicians then apply drying techniques, balancing air circulation and dehumidification to raise the evaporation rate without stressing the assembly.
They also factor in insulation considerations so trapped moisture doesn’t stay hidden above the ceiling plane. This process protects structural integrity, shortens the restoration timeline, and helps you stay informed at every step.
You’re not left guessing; you’re guided with clear measurements, practical updates, and a plan that supports a safe, consistent recovery for your space.
Stop the Leak and Protect the Area
First, shut off the water source to stop additional intrusion and limit further structural saturation.
Next, contain the spread by placing barriers, towels, or plastic sheeting around the affected area.
Then move valuables safely out of the impact zone so you can protect contents while drying and repair work begins.
Shut Off Water
Shut off the water at the source as soon as you can to stop additional damage and protect the drying area. You’ll usually find the main valve near the meter, heater, or fixture, and a quick turn can limit saturation fast.
If the leak came from above, confirm the water supply is fully off before you begin leak detection or cleanup. Stay calm; you’re taking the right first step to help your space recover.
- Turn the valve clockwise until it stops.
- Check faucets for a brief pressure release.
- Label the shutoff for faster response later.
Once the flow stops, document where moisture was active and verify no new dripping appears. This keeps your drying plan accurate and helps your team work with confidence.
Contain the Spread
Once the source is off, contain the spread by isolating the wet area and protecting adjacent materials from further exposure. You should close doors, restrict foot traffic, and set barriers with plastic sheeting or absorbent containment as needed.
Use your emergency response checklist to confirm the ceiling, walls, and flooring stay stable while you work. If water is still dripping, place temporary collection points under active leaks and monitor them closely.
Keep airflow controlled so moisture doesn’t migrate into nearby rooms. These preventative measures help you limit secondary damage and support faster structural drying.
Stay organized, communicate clearly with everyone on site, and you’ll create a safer, calmer environment for the next steps.
Move Valuables Safely
Before drying equipment goes in, you should move valuables out of the affected area and protect items that can’t be relocated. Use safe relocation for documents, electronics, and heirlooms, and keep pathways clear so your team can work without delay.
Wrap fragile items in clean, dry material, label containers, and stage them in a dry, secure room. This valuable protection step reduces secondary damage and helps your space recover faster.
- Box books and records in sealed cartons
- Elevate furniture on blocks or plastic runners
- Cover immovable fixtures with polyethylene sheeting
You’re not handling this alone; a coordinated move keeps everyone efficient and calm.
Check for dampness on every item before it returns, and log what you removed so nothing gets lost during restoration.
Inspect Ceiling Damage for Hidden Moisture
If the ceiling shows staining, sagging, or texture changes, you should inspect it closely for hidden moisture, because surface damage often extends beyond what you can see.
Use moisture detection tools to compare damp and dry areas, and trace readings around seams, fixtures, and wall intersections.
During ceiling inspections, look for soft spots, cracked paint, bubbling tape, or uneven temperature that may signal water trapped above the finish.
You don’t need to guess; methodical checks help you confirm the affected zone and avoid overlooking members of the crew’s shared work area.
If readings stay elevated, mark those locations clearly and report them so everyone can act on the same reliable information.
Careful inspection builds confidence and keeps the drying process organized.
Set Up Drying Equipment the Right Way
Place your air movers and dehumidifiers so they target the wettest structural materials first and allow clear airflow across the affected area.
You’ll get better results when you position equipment to support evaporation and moisture removal without creating dead zones or short-cycling.
Monitor moisture levels continuously so you can adjust placement and keep the drying process on track.
Strategic Equipment Placement
Once the area is dry enough for drying equipment to work efficiently, you’ll want to position each unit to create steady airflow across wet materials and hidden cavities.
Match equipment types to the space: place air movers to wash walls, floors, and framing, and aim dehumidifiers where they can pull moisture from the room’s air without obstruction.
Use airflow dynamics to guide spacing, keeping hoses, cords, and furniture clear so each stream reaches the dampest zones.
- Direct fans toward baseboards and wall cavities.
- Center dehumidifiers in open pathways.
- Angle units so air can return freely.
When you arrange equipment with care, you support even drying and help the whole team work as one.
That calm, deliberate setup gives your structure the best chance to recover efficiently.
Continuous Moisture Monitoring
As drying begins, you need to track moisture at regular intervals so you can verify that equipment is working and catch hidden wet areas early.
Use moisture detection tools on walls, floors, framing, and insulation, then record readings at the same points each day. Compare the numbers against your target drying goals, and adjust airflow, dehumidification, or heat when progress slows.
You’ll protect the structure faster when you follow proven drying techniques and keep conditions stable. Check behind trim, under baseboards, and in cavities where water can linger.
If readings plateau, move equipment or open concealed spaces for better circulation. Consistent monitoring helps you stay confident, avoid missed damage, and keep your team aligned as the space returns to normal.
Dry Framing, Drywall, and Insulation Fast
You need to dry framing, drywall, and insulation fast to stop hidden moisture from spreading and to reduce the risk of mold, swelling, and structural deterioration.
You can do this with targeted drying techniques that move air through cavities, surface-dry exposed framing, and protect materials you still can save.
Use moisture assessment to guide where to place drying equipment and which areas need focused restoration solutions.
Keep the space organized so your team works efficiently and feels confident in each step.
- Position air movers along damp studs and base plates.
- Remove wet insulation that can’t dry in place.
- Open wall cavities only where access improves drying.
Check Moisture Levels as You Dry
You should verify drying progress with a moisture meter at each stage, comparing readings in affected materials to nearby dry areas.
Check behind baseboards, inside wall cavities, and under flooring for hidden dampness, since surface dryness doesn’t always mean the structure is fully dry.
Keep testing until readings stabilize at normal levels, so you can confirm the assembly’s safe return to service.
Moisture Meter Readings
Moisture meter readings give you a clear, objective way to track drying progress after a leak. You can compare affected and unaffected areas, then watch values drop as materials recover.
Good meter calibration matters, because even small errors can hide true moisture impact and slow your decisions. Stay consistent with probe placement, pressure, and timing so your data stays reliable and your team can trust the numbers.
- Read trim, drywall, and framing at the same time.
- Record each reading with date, location, and material.
- Recheck until readings match normal building baseline.
When values level off, you know you’re nearing dry conditions. That steady feedback helps you stay confident, coordinated, and in control throughout restoration.
Hidden Dampness Checks
Even when surface materials start to look dry, hidden dampness can remain trapped in wall cavities, subfloors, insulation, and behind trim.
You should verify moisture levels with a calibrated meter at multiple depths and locations, not just on exposed surfaces. Compare readings against unaffected areas to confirm drying progress and spot hidden moisture early.
Use damp detection tools, including infrared imaging and pin probes, to trace cooler zones and elevated readings that suggest trapped water.
Recheck corners, baseplates, and ceiling edges daily, since these areas often dry last. If readings plateau, increase airflow, dehumidification, or targeted removal.
Watch for Mold After Ceiling Water Damage
After ceiling water damage, inspect hidden cavities and nearby finishes for mold growth as soon as the area dries. You can protect your space with steady ceiling inspections and practical mold prevention steps.
Look for discoloration, musty odor, or fuzzy spotting along seams, trim, and fasteners. Check insulation edges, attic-side framing, and any backed-up drywall where moisture may linger. Keep the room ventilated and document changes so you can compare conditions over time.
If you notice new staining, you’re not overreacting; you’re catching early biological activity before it spreads.
- Brown rings on painted ceilings
- Dark specks inside vents or corners
- Soft, damp drywall around patch lines
Know When Ceiling Materials Must Come Out
When inspections show swelling, sagging, delamination, persistent staining, or a soft surface that won’t dry back to normal, you need to remove the affected ceiling materials. You protect the structure by treating these signs as failure, not cosmetic damage.
Different ceiling material types respond differently: gypsum board, plaster, and acoustic tile can each show hidden moisture retention after an overhead leak. If the panel has lost rigidity, crumbles at the edges, or separates from framing, replacement is the safe choice.
You’ll also avoid trapping damaged layers behind finish work. A qualified dry-out team can confirm what stays and what goes, so you can move forward with confidence and feel supported throughout the repair process.
Avoid Drying Mistakes That Leave Moisture Behind
If you rush the drying process, you can leave moisture trapped inside cavities, beneath flooring, or behind wall finishes. You need to slow down and use drying techniques that move air through concealed spaces, not just across the surface.
Check baseboards, insulation edges, and seam lines for moisture retention after each cycle. You belong to the group that verifies progress with meters, then adjusts airflow, heat, and dehumidification to match the material’s response.
- Lift carpet edges to expose underlay
- Open access points for wall cavities
- Recheck damp corners and trim joints
When you dry methodically, you reduce hidden wet zones and support a stable, clean recovery.
Call a Water Damage Restoration Pro
Even careful drying can leave hidden moisture in wall cavities, subfloors, or insulation, so you should bring in a water damage restoration pro when the scope goes beyond what you can verify with meters and airflow adjustments.
You’ll get a thorough damage assessment, including moisture mapping, material testing, and checks for microbial risk. A qualified team can handle water extraction, remove saturated materials, and set up targeted structural drying with the right equipment.
They’ll document conditions, confirm when assemblies reach safe moisture levels, and help you avoid secondary damage that DIY efforts can miss.
When you work with experienced pros, you’re not facing the problem alone—you’re joining a team that knows how to restore your space efficiently, protect your home’s structure, and give you clear next steps with confidence.
Frequently Asked Questions
How Long Does Structural Drying Usually Take After Overhead Leak Damage?
You’ll usually need 2–5 days, but drying factors like material saturation and ventilation can extend it. Professional drying methods speed results, and you’re not alone—your crew’ll monitor moisture until everything’s safe and stable.
Can I Stay in My Home While the Ceiling Dries?
You can often stay home if the area’s stable, but you’ll need safety precautions and proper drying methods. Check for sagging, electrical risks, and mold, then follow the dry professional’s guidance closely.
What Equipment Works Best for Drying Wet Ceiling Insulation?
For wet insulation, you’ll get the best results with high-volume air movers, low-grain dehumidifiers, and controlled heat; like a steady dawn, this drying equipment helps you restore comfort, and you’re not alone.
Does Insurance Usually Cover Structural Drying After a Leak?
Usually, your insurance policy covers structural drying after a leak if the cause’s sudden and accidental, though coverage limits apply. You’ll want to review exclusions, document damage, and contact your insurer quickly for clarity.
How Do I Know if Hidden Damage Spread Into the Attic?
Most leaks showing attic stains first: schedule an attic inspection, look for hidden leaks, damp insulation, rusted fasteners, and warped wood. You’re not alone—early checks protect your home.
Conclusion
You’ve seen how structural drying stops ceiling seepage from becoming serious secondary damage. By promptly protecting the area, pinpointing hidden moisture, and positioning air movers and dehumidifiers correctly, you speed safe, steady stabilization. Keep checking moisture readings, because dry numbers prove progress. If wet insulation, warped drywall, or lingering dampness remains, remove it fast. When conditions get complicated, call a restoration pro—swift, skilled service stops stubborn moisture and supports solid structural recovery.