
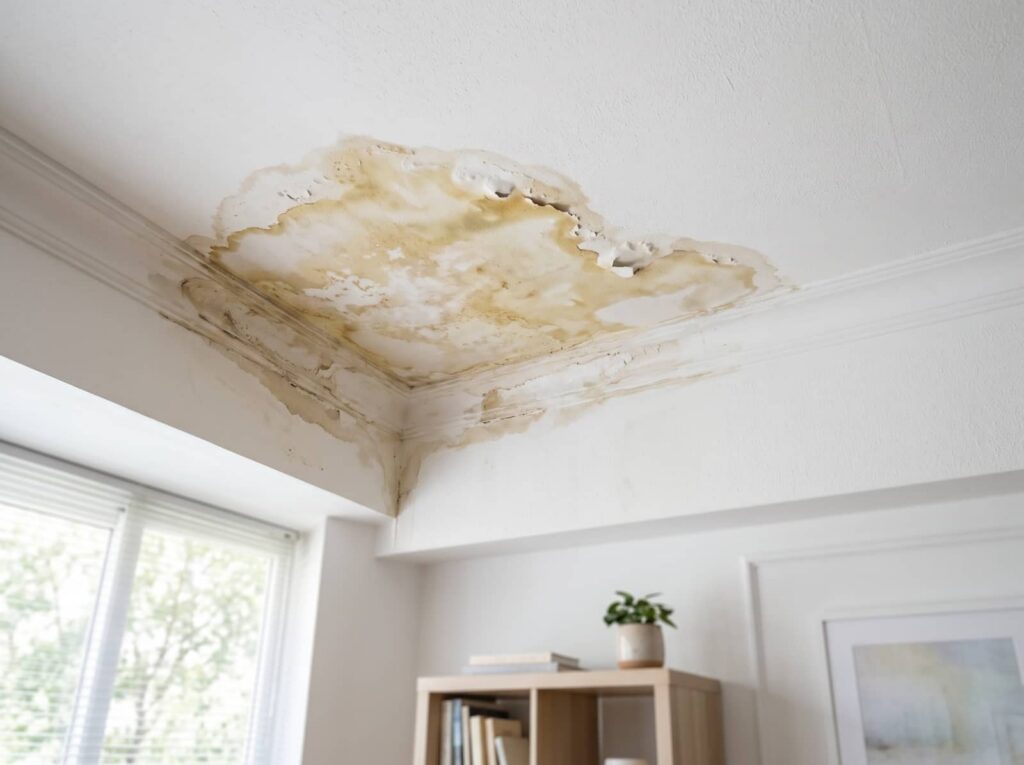
If you notice a ceiling stain right after a small plumbing drip, that coincidence can save you from bigger repairs. You need to spot discoloration, sagging, and hidden moisture fast, then stop the leak and dry the area thoroughly. From there, you’ll know when mold remediation, drywall replacement, texture matching, or a pro inspection becomes necessary—and the costs may not be what you expect.
Key Takeaways
- Look for ceiling stains, bubbling paint, sagging drywall, and musty odors to identify water damage early.
- Stop the leak immediately by shutting off the water source and tracing the active leak path.
- Inspect beyond visible damage with a moisture meter to find hidden saturation in drywall, insulation, or framing.
- Dry the area completely using fans, dehumidifiers, and ventilation before any repair work begins.
- Replace damaged materials, match ceiling texture and paint, and hire a licensed, insured professional when needed.
Identify Ceiling Water Damage Signs
If you spot discoloration, bubbling paint, or a soft, sagging ceiling surface, you may be seeing early signs of water intrusion.
You can confirm ceiling discoloration signs by checking for yellow, brown, or rust-colored rings around fixtures, seams, and corners.
During water stain identification, note whether the mark feels dry, chalky, or damp, since texture helps distinguish old staining from active moisture.
You should also look for peeling joint compound, cracked plaster, or a subtle odor that suggests hidden saturation.
Use good lighting and view the ceiling from multiple angles so you don’t miss faint edges or irregular patches.
When you identify these indicators early, you join a group of homeowners who catch problems before they spread and simplify future repairs.
Stop the Leak First
Before you repair the ceiling, you need to stop the water source and prevent further saturation. Shut off the nearest supply valve, then verify whether the leak is active or intermittent.
If the source isn’t obvious, use leak detection methods: trace wet lines, inspect fixtures, and watch for drips after each water use. A plumbing inspection can confirm whether a damaged pipe, loose fitting, or failed seal is feeding the ceiling stain.
You should also isolate appliances on the same branch line to narrow the issue. Act fast, because every minute of flow weakens your repair base and increases cleanup time.
When you control the source, you protect your home and join other homeowners who tackle damage with a clear, methodical response.
Check for Hidden Ceiling Damage
Once you’ve stopped the leak, inspect the ceiling for damage that isn’t visible from the stain alone. You should probe the area with a moisture meter, because hidden leaks often spread beyond the obvious wet spot.
Check for soft drywall, sagging joint tape, hairline cracks, and discoloration around seams, fasteners, and light fixtures. If the ceiling feels cool or spongy, mark the affected zone and widen your inspection to nearby joists and insulation cavities.
Good moisture detection helps you confirm whether water remains trapped above the surface. Look for musty odors, peeling paint, or rust on metal components, since these clues signal deeper intrusion.
When you verify the full extent of the damage, you’ll know exactly what needs repair and can move forward with confidence.
Dry the Ceiling Thoroughly
Dry the ceiling thoroughly as soon as you confirm the leak source is controlled.
Remove moisture quickly with fans, dehumidifiers, and dry cloths to limit swelling, staining, and material breakdown.
Improve air circulation by opening vents or windows when conditions allow, and keep airflow steady until the surface and framing are fully dry.
Remove Moisture Quickly
As soon as you’ve stopped the leak, remove standing water and dry the ceiling assembly immediately to limit staining, warping, and mold growth.
Use moisture extraction on wet insulation, drywall seams, and framing cavities before liquid can migrate deeper. Blot accessible surfaces with clean towels, then apply controlled rapid drying to the affected area until the material feels uniformly dry and no cool, damp spots remain.
Check texture, sagging, and discoloration along joists and panel edges, because hidden retention can persist behind intact paint. If you belong to a team handling the repair, document each pass so everyone tracks progress consistently.
Don’t trap moisture under coverings or delay removal, since every hour increases the chance of structural degradation and microbial colonization.
Improve Air Circulation
After removing standing water, improve airflow so the ceiling assembly dries evenly and doesn’t hold moisture in hidden cavities. Open windows if outdoor air is dry, then place box fans to push air across the wet surface and exhaust humid air out of the room.
Use dehumidifiers alongside these ventilation techniques to lower relative humidity and speed evaporation. If you can access the attic, run a second fan to support airflow improvement above the damaged area, but keep electrical equipment clear of wet insulation and wiring.
Check for cool, damp spots with your hand or a moisture meter each day. You’re protecting your home’s structure and staying in control, so keep air moving until the drywall, framing, and insulation read dry and stable.
When Ceiling Mold Remediation Is Needed
When should you treat ceiling discoloration as a mold problem? You should act when the spot spreads, darkens, or returns after cleaning, because that often signals active mold growth behind the finish.
If you detect a musty odor, recurring moisture, or visible colonies, you need remediation rather than simple stain cover-up. You also should respond quickly if anyone in your home has asthma, allergies, or other health risks, since spores can worsen symptoms.
A qualified technician can assess moisture sources, test affected materials, and contain contaminated areas. That helps you protect your space and stay confident that the problem’s being handled correctly.
Don’t wait for the pattern to enlarge; early intervention limits material loss and reduces the chance that hidden mold keeps developing in your ceiling cavity.
Fix Ceiling Stains and Sagging
First, you need to identify and stop the water source before you repair any ceiling stains or sagging sections.
Then dry the area completely and stabilize any softened drywall or plaster so the damage doesn’t spread.
After the substrate is firm, patch the stains and cracks with a suitable repair compound and prime the surface for a uniform finish.
Identify Water Source
Before you repair ceiling stains or sagging, you need to trace the leak to its source and stop the water intrusion completely.
Start with water detection by inspecting plumbing lines, roof penetrations, HVAC condensate drains, and nearby fixtures. You’ll belong to the group of homeowners who solve problems at the root, not the surface.
Use a flashlight, moisture meter, and controlled observation to pinpoint active entry points. Check for fresh drips, rust marks, and softened drywall edges.
For leak prevention, document the exact location and test adjacent areas so you don’t miss a secondary path.
- Inspect above the stain
- Probe suspect joints
- Verify fixture seals
- Examine roof flashing
- Record source evidence
Dry And Stabilize
Once you’ve stopped the leak, dry the affected ceiling completely and stabilize any weakened material before you attempt cosmetic repairs.
You should lower indoor humidity, increase airflow, and use targeted drying techniques such as fans and dehumidifiers to move moisture out of the cavity. Keep insulation, furniture, and flooring protected so you’re not spreading damage through the room.
Check for soft spots daily; if a section feels spongy, support it from below and keep traffic away until it firms up. Good moisture control prevents mold growth and limits further sagging.
If the ceiling is still damp after repeated drying, remove trapped water above the surface and reassess the structure. You’re protecting your home and helping the whole space return to a safe, stable condition.
Patch Stains And Cracks
With the ceiling dry and stable, you can patch the remaining stains and cracks. Start by scraping loose material, then lightly sand the edges so your repair bonds cleanly.
For stain removal, apply a stain-blocking primer; it keeps water marks from bleeding through fresh paint. Use proven patch techniques with joint compound, applying thin coats and feathering each layer beyond the damaged area.
If the ceiling has a sagging section, cut out compromised drywall and install a new patch flush with the surface.
- Clean the repair zone
- Tape larger cracks
- Let each coat dry
- Sand between coats
- Reprime before painting
You’ll get a smoother finish and a repair that fits right in.
Replace Damaged Drywall or Plaster
Cut out any drywall or plaster that has softened, sagged, stained, or crumbled from the water damage. You’ll need to expose solid framing and square the opening so the repair fits cleanly.
Measure the removed section, then cut matching replacement material for a tight, flush seam. If you’re working with gypsum board, follow standard drywall installation practices: secure the panel to joists, stagger joints, and use proper screw spacing.
For older finishes, plaster replacement may require lath repair or a bonding agent before you apply new coats. Check that all wet insulation and debris are gone, then confirm the cavity is dry before closing it.
When you rebuild the ceiling this way, you’re protecting your home and restoring a smooth, durable surface your household can trust.
How Much Ceiling Water Damage Repairs Cost
You’ll usually pay based on the damaged area’s size, the material type, and whether the leak also affected insulation, framing, or paint.
Minor ceiling repairs can cost a few hundred dollars, while extensive water damage can run into the low thousands.
To estimate your total, you need to account for both labor and any moisture mitigation required before finishing the repair.
Repair Cost Factors
Several factors drive ceiling water damage repair costs, including the leak’s source, the size of the affected area, the extent of staining or structural deterioration, and whether drywall, insulation, paint, or framing needs replacement.
You’ll also see costs shift based on access difficulty, moisture remediation, and local labor rates. If you have insurance coverage, your out-of-pocket share may change after inspection and deductible review.
DIY repairs can seem cheaper, but they may miss hidden moisture and worsen damage.
- Leak origin and plumbing complexity
- Ceiling area size and material type
- Hidden moisture and mold risk
- Required demolition and drying time
- Finish matching for paint and texture
When you understand these variables, you can discuss scope clearly with your contractor and feel confident about the plan.
Typical Price Ranges
Typical ceiling water damage repairs often cost from a few hundred dollars for a small, localized patch to several thousand dollars when the leak affects insulation, framing, or multiple ceiling sections.
You’ll usually pay less for a simple stain repair than for drywall replacement, texture matching, repainting, or mold remediation. If the source is still active, stop it first; otherwise, costs can escalate fast.
Your insurance coverage may reduce out-of-pocket expense, but deductibles and exclusions matter. DIY repairs can save money on minor cosmetic fixes, yet they’re risky if moisture remains behind the surface.
For many homeowners, a professional inspection helps you budget accurately and avoid repeat damage. In your community, that guidance can make the process feel manageable and less overwhelming.
Match Ceiling Texture and Paint
Once the patched area is fully dry and sealed, match the existing ceiling texture before you repaint so the repair blends cleanly with the surrounding surface.
Use texture matching to copy the same pattern, whether you’re working with orange peel, knockdown, or a smooth finish. Test on scrap material first, then adjust spray pressure, joint compound thickness, and application angle until the texture reads uniformly.
For paint selection, choose the same sheen and base color as the original ceiling; even slight differences can expose the repair.
- Feather texture edges outward
- Let each coat dry completely
- Compare under natural light
- Prime repaired spots evenly
- Blend paint beyond the patch
When you take your time, your ceiling feels cohesive, and the repair stays nearly invisible to everyone in the room.
How to Choose a Ceiling Repair Pro
If the repaired area still needs more than matching texture and paint to look right, you may want a ceiling repair pro who can assess the damage, identify the source of the leak, and restore the surface correctly.
You should verify repair qualifications, including licensing, insurance, and experience with drywall, plaster, and moisture remediation. Ask how they document hidden damage and whether they’ll coordinate with plumbing or roofing trades when needed.
Review customer reviews for consistency in communication, cleanliness, and scheduling, not just star ratings. You belong with a contractor who explains each step, provides a written scope, and uses moisture meters, sealants, and finish systems suited to your ceiling type.
Choose someone who offers clear timelines, honest estimates, and workmanship warranties.
Frequently Asked Questions
How Long Does Ceiling Water Damage Repair Usually Take?
Usually, you’ll need one to three days for minor repairs, but larger jobs can take a week or more after damage assessment. Your repair timeline depends on drying, material replacement, and finishing needs.
Will My Homeowners Insurance Cover Ceiling Water Damage Repairs?
Usually, yes, if the damage came from a sudden, covered event. You’ll need a damage assessment, and your policy’s insurance coverage may exclude leaks, neglect, or maintenance issues. Review your exclusions and deductible.
Can I Stay in My Home During Ceiling Repairs?
Maybe—you can stay if the ceiling safety assessment says the area’s stable, but the repair process may require temporary relocation. You’ll belong safer at home when pros isolate work zones, control dust, and inspect continually.
What Tools Are Needed for Minor Ceiling Water Damage?
You’ll need a utility knife, putty knife, sanding block, joint compound, primer, drywall patch, caulk, screwdriver, ladder, and moisture meter. These repair techniques address minor water damage, helping you restore your ceiling confidently and cleanly.
How Can I Prevent Ceiling Water Damage From Happening Again?
You can prevent it by sealing leaks and improving drainage; dry ceilings feel safe, while hidden moisture breeds damage. Use waterproofing techniques and routine inspections to spot faults early, so you’ll protect your home and community.
Conclusion
If you ignore a ceiling stain, it rarely stays a stain—it usually becomes a larger repair bill. You should spot discoloration, stop the leak, and verify hidden damage before moisture spreads. Dry the area completely, address mold when present, and replace compromised drywall or plaster. Then match texture and paint for a clean finish. When you hire a qualified pro, you don’t just fix the damage—you help prevent the next surprise.