After a severe flood in a local community center, mold began to proliferate within days, highlighting the urgency of effective remediation techniques. To combat such situations, you need a thorough assessment of damage and moisture levels before taking action. Understanding the systematic approach to mold remediation can greatly influence outcomes and ensure a safer environment. What are the most critical steps you should take to prevent future mold growth?
Key Takeaways
- Conduct a thorough damage assessment to identify affected areas and document findings with photographs for insurance communication.
- Wear protective gear, including N95 respirators and gloves, to ensure personal safety during mold remediation.
- Quickly remove standing water using pumps and wet vacuums to prevent mold growth from prolonged moisture exposure.
- Clean and disinfect surfaces with appropriate solutions like hydrogen peroxide or botanical anti-microbials to eliminate mold spores.
- Regularly monitor for mold post-remediation and implement preventative measures, such as enhancing ventilation and using mold-resistant materials.
Assessing the Damage and Moisture Levels
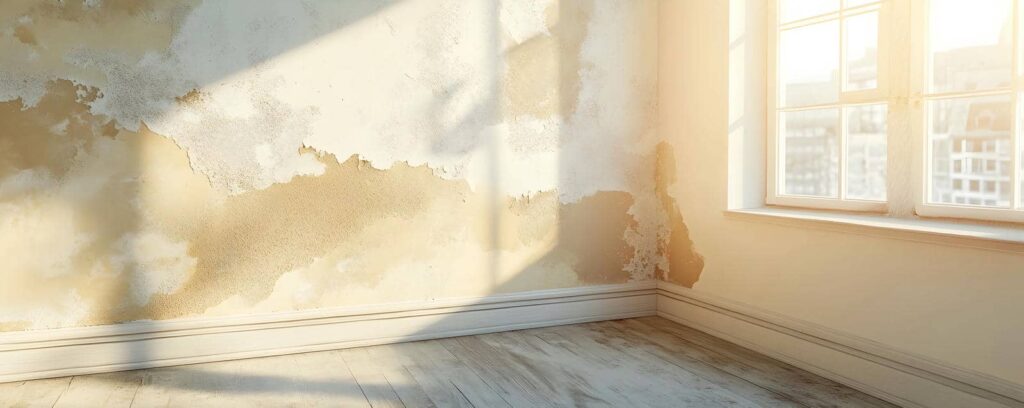
After a flood, evaluating the damage and moisture levels in your property is essential for effective mold remediation.
Start with a thorough damage assessment to identify affected areas, such as walls, flooring, and furniture. Documenting these findings with photographs can help you communicate with insurance companies and remediation professionals.
Next, proceed with moisture measurement using a hygrometer or moisture meter. This step is critical, as high moisture levels create an environment conducive to mold growth.
Determine which materials can be salvaged and which need replacement based on their moisture content.
Ensure you assess hidden spaces like behind walls and under carpets, as mold can thrive in these areas.
Ensuring Safety Measures and Personal Protective Equipment
As you prepare for mold remediation, prioritizing safety measures and personal protective equipment (PPE) is essential. Your personal safety should be your top concern, especially when dealing with potentially harmful mold spores.
Start by wearing protective gear such as N95 respirators, gloves, and goggles to shield yourself from exposure. This gear protects you and helps create a safe environment for anyone assisting you.
Make certain your clothing is durable and covers your skin to minimize direct contact with contaminated materials. Consider using disposable coveralls for extra precaution.
Always ensure adequate ventilation in the work area, as stagnant air can exacerbate mold growth and health risks.
Removing Standing Water Quickly
To effectively remove standing water, you should start by using pumps to extract large volumes quickly.
Wet vacuums are also essential for capturing residual moisture in less accessible areas.
Additionally, promptly removing debris will help facilitate the water removal process and prevent further complications.
Use Pumps Effectively
When flooding occurs, using pumps effectively can greatly expedite the removal of standing water, minimizing potential damage.
To start, choose the right pump types for your situation—submersible pumps work best for deep water, while utility pumps are ideal for smaller areas.
Before you begin, verify proper pump maintenance; check for clogs, test the motor, and inspect the power supply. This preparation can prevent breakdowns during critical moments.
As you operate the pump, monitor its performance to verify efficient water removal. Keep an eye on the water level, and be ready to adjust or switch pumps if necessary.
Employ Wet Vacuums
Wet vacuums are essential tools for quickly removing standing water after a flood, especially in areas where pumps may struggle to reach. When choosing wet vacuum types, consider factors like tank capacity and power, as these can affect efficiency.
For effective wet vacuum techniques, start from the farthest point of the affected area and work your way toward the exit. This prevents water from flowing back into already cleaned sections. Use a systematic approach, overlapping your passes to ensure thorough extraction.
Don’t forget to empty the tank regularly to maintain suction power. By employing wet vacuums properly, you can greatly reduce moisture levels, creating a less hospitable environment for mold growth, and supporting a healthier living space.
Remove Debris Promptly
After a flood, it’s vital to remove debris promptly to prevent further complications, including mold growth and structural damage.
Different debris types can pose unique challenges, so using effective removal techniques is critical.
Here are three common debris types you may encounter and how to handle them:
Wet materials: Remove soaked carpets and padding quickly; they’re mold magnets.
Furniture: Salvage what you can by drying it out or discarding heavily damaged items.
Silt and mud: Use shovels and brooms to clear away this residue, ensuring surfaces are clean.
Drying Out Affected Areas Effectively
Rapid drying is essential to prevent mold growth in water-damaged areas.
You’ll need the right equipment, such as dehumidifiers and fans, to accelerate the process effectively.
Additionally, monitoring humidity helps keep moisture in check, further safeguarding your space from potential mold issues.
Importance of Rapid Drying
Effective drying of affected areas is essential in mitigating mold growth, especially following flooding incidents.
Rapid drying techniques are your first line of defense against mold proliferation. The sooner you act, the better your chances of preventing significant damage.
Here are three vital moisture evaporation methods to take into account:
Air Circulation: Use fans to increase airflow, promoting faster drying.
Dehumidifiers: Employ dehumidifiers to extract moisture from the air, reducing humidity levels.
Heat Application: Utilize heat sources cautiously to accelerate evaporation without causing further damage.
Equipment for Efficient Drying
To achieve ideal drying in areas affected by flooding, using the right equipment is essential. Infrared cameras can help you identify hidden moisture in walls, ceilings, and floors that might otherwise go unnoticed. By detecting temperature differences, these cameras provide visual cues, guiding your drying efforts effectively.
Additionally, moisture meters are invaluable tools that allow you to accurately measure the moisture content in various materials. This precision ensures you target the dampest areas first, maximizing your drying efficiency.
Together, these tools help you create a thorough and informed approach to flood recovery, fostering a sense of community as you share insights and tips with others facing similar challenges. Investing in this equipment means you’re committed to restoring your space properly.
Monitoring Humidity Levels
While you focus on drying out affected areas after flooding, monitoring humidity levels becomes a crucial aspect of the remediation process.
By ensuring effective humidity control, you can prevent mold growth and further damage.
Here are three key strategies for moisture monitoring:
Use a Hygrometer: Track humidity levels regularly to ensure they remain below 60%.
Ventilation: Open windows and doors or use fans to promote airflow, helping to reduce moisture levels.
Dehumidifiers: Invest in dehumidifiers to actively remove excess moisture from the air, enhancing your drying efforts.
Cleaning and Disinfecting Surfaces
Cleaning and disinfecting surfaces after flooding is essential for preventing mold growth and ensuring a safe environment. Start by employing effective surface preparation techniques; remove any debris and dirt before applying disinfectants. This step enhances the disinfectant’s effectiveness and ensures it reaches the surface material directly.
When it comes to disinfectant application methods, choose products specifically designed to combat mold and mildew. Use a spray bottle or cloth to evenly distribute the disinfectant across surfaces, making sure you cover all affected areas thoroughly. Allow the disinfectant to sit for the recommended time to maximize its efficacy.
Finally, rinse surfaces with clean water if necessary, especially on items that come into contact with food or skin.
Identifying and Removing Contaminated Materials
After a flood, identifying and removing contaminated materials is crucial for preventing mold proliferation and protecting your health.
To effectively tackle this task, you’ll need to employ mold identification techniques to recognize materials that may harbor mold spores. Here are three key materials to assess:
Drywall: If it’s been soaked and shows discoloration or a musty odor, it’s likely contaminated.
Carpeting: Water-damaged carpets can be a breeding ground for mold, especially if they remain wet for over 24 hours.
Insulation: Fiberglass insulation that’s been wet should be replaced, as it’s difficult to dry completely.
Once you’ve identified these materials, use appropriate material disposal methods to safely remove them from your space.
Using Dehumidifiers and Air Movers
Using dehumidifiers and air movers is essential for effectively managing moisture levels following a flood. By controlling humidity, you minimize the risk of mold growth and help your home dry out quickly.
First, set your dehumidifier settings to the ideal level—typically around 30-60% humidity. This creates an environment that’s less favorable for mold spores to thrive.
Next, focus on air mover placement. Position these devices strategically to maximize airflow throughout all affected areas. Place them near wet materials, like carpets or drywall, to enhance evaporation. You might need to adjust their angles for ideal coverage, ensuring no corner remains stagnant.
Regularly monitor both the dehumidifier and the air movers, as their effectiveness can considerably impact your remediation efforts.
Applying Anti-Microbial Solutions
Once you’ve successfully reduced moisture levels, applying anti-microbial solutions becomes essential in preventing mold and bacteria from re-establishing themselves.
Choosing the right anti-microbial types and application methods can make a significant difference in your remediation efforts. Here are three effective options to evaluate:
Chlorine Bleach: This powerful solution can kill mold spores on non-porous surfaces. Remember to use it in well-ventilated areas to minimize health risks.
Hydrogen Peroxide: A safer alternative, it effectively eliminates mold and bacteria while being less harsh on surfaces. It’s particularly useful for fabrics and porous materials.
Botanical Anti-Microbials: These eco-friendly options, made from natural ingredients, can be effective and safe for indoor use, promoting a healthier environment.
Monitoring for Mold Growth Post-Remediation
How can you ensure that your mold remediation efforts have been successful? Monitoring for mold growth post-remediation is essential. Start by conducting regular post-remediation inspections to identify any potential mold growth indicators. These indicators can include musty odors, visible mold patches, or increased humidity levels in the affected areas.
Implement a systematic approach to check previously treated spaces. Look for moisture retention, as damp conditions often facilitate mold resurgence. Use moisture meters to detect hidden water sources that could lead to new growth. Document your inspections to spot trends over time and verify accountability.
If you notice any mold growth indicators, act promptly to address them. This proactive monitoring safeguards your home and fosters a healthier environment for you and your loved ones.
Implementing Preventive Measures for the Future
To prevent future mold issues, you need to implement a series of proactive measures.
Regular moisture inspections will help you catch problems early, while enhancing your ventilation systems can greatly reduce humidity levels.
Additionally, using mold-resistant materials in your home can provide an extra layer of protection against infestations.
Regular Moisture Inspections
While many homeowners focus on immediate repairs after flooding, neglecting regular moisture inspections can lead to long-term issues.
By incorporating consistent moisture detection into your home maintenance routine, you can prevent mold growth and protect your investment.
Here are three key components to evaluate for your inspection frequency:
Basements and Crawl Spaces: Inspect these areas monthly, as they’re prone to moisture accumulation.
Attics and Roofs: Check at least biannually, ensuring that leaks or condensation aren’t overlooked.
Wall Cavities: Use moisture meters to assess hidden areas every six months to catch potential problems early.
Enhance Ventilation Systems
Enhancing your home’s ventilation systems is essential for preventing mold growth, especially after experiencing flooding. A well-thought-out ventilation design ensures consistent airflow, reducing humidity levels on which mold thrives.
You can improve air quality by installing exhaust fans in areas prone to moisture, like bathrooms and kitchens, and verifying your HVAC system is equipped with proper filters. Regularly cleaning ducts and vents can also minimize stagnant air, which is a breeding ground for mold.
Consider natural ventilation options, such as opening windows when the weather permits, to encourage air circulation. By proactively addressing your home’s ventilation needs, you create a healthier environment, fostering a sense of belonging and well-being for you and your loved ones.
Use Mold-Resistant Materials
After improving ventilation systems, consider using mold-resistant materials in your home to further combat mold growth.
These materials help prevent future infestations and promote a healthier living environment.
Here are three essential options to explore:
Mold-resistant paints: These specially formulated paints contain antimicrobial properties that inhibit mold growth on walls and ceilings.
Moisture barriers: Installing moisture barriers in basements and crawl spaces can prevent humidity from seeping into your home, reducing mold risk.
Mold-resistant drywall: This type of drywall is designed to resist moisture and mold, providing an added layer of protection in areas prone to dampness.
Frequently Asked Questions
How Long Does Mold Remediation Typically Take After Flooding?
Mold remediation typically takes 1 to 2 weeks, depending on the extent of mold growth and the affected areas. You’ll want to ensure thorough assessment and treatment to prevent future issues, making the remediation timeline essential for your home’s safety.
What Are the Signs of Hidden Mold Growth?
You’ll notice signs of hidden mold growth through musty odors, water stains, and health symptoms like sneezing or skin irritation. Employ mold detection methods, such as moisture meters or air quality tests, to confirm its presence.
Can I Perform Mold Remediation Myself?
Yes, you can perform mold remediation yourself using DIY techniques, but make sure you follow essential safety precautions. Proper gear, ventilation, and containment are vital to protect yourself from potential health risks during the process.
What Is the Cost of Professional Mold Remediation Services?
Professional mold remediation services typically cost between $500 and $6,000, depending on the extent of the infestation and the chosen mold removal techniques. It’s essential to invest in experts for effective and thorough remediation.
Will My Insurance Cover Mold Remediation Costs?
Many homeowners don’t realize that insurance policies include mold coverage. Check your policy details, because some insurers might cover mold remediation costs, but exclusions often apply, leaving many unprotected after flooding.
Review
Tackling mold post-flooding is not just about cleanup; it’s about safeguarding your home for the future. By evaluating damage, removing water, and employing effective drying and cleaning techniques, you’re not merely fighting mold—you’re fortifying your space against it. Think of your home as a fortress; neglecting these steps is like leaving the gates wide open. Stay vigilant and proactive, and you’ll ensure a healthier environment for you and your loved ones.