If you’ve noticed ceiling water damage on your ceiling, you’re not alone. Many homeowners face this issue, but finding affordable solutions doesn’t have to be overwhelming. By understanding the causes and signs of water damage, you can take proactive steps to address the problem without breaking the bank. Let’s explore some practical DIY fixes and budget-friendly materials that can help you restore your ceiling effectively and prevent future issues. What options are worth considering?
Key Takeaways
- Identify water damage early through signs like stains, peeling paint, and musty odors to prevent costly repairs later.
- Use waterproof sealants and patching materials as temporary fixes until permanent repairs can be made.
- Opt for budget-friendly materials like drywall, plywood, and vinyl panels for effective and affordable ceiling repairs.
- Document damage thoroughly to facilitate smoother insurance claims and ensure you receive the coverage needed for repairs.
- Seek local resources, referrals, and online directories to find affordable restoration services and assistance programs.
Understanding Ceiling Water Damage: Causes and Effects
When you’ve got a water-stained ceiling, it’s not just an eyesore; it’s often a sign of a deeper issue. Understanding the common water leakage sources is essential. It could be a leaky roof, damaged plumbing, or even condensation build-up.
Each of these problems can lead to significant damage if ignored. You want to act quickly to prevent further issues.
Implementing prevention methods, like regular roof inspections and maintaining your plumbing system, can save you headaches down the line. Sealing gaps around windows and ensuring proper ventilation can also help.
Signs of Ceiling Water Damage You Shouldn’t Ignore
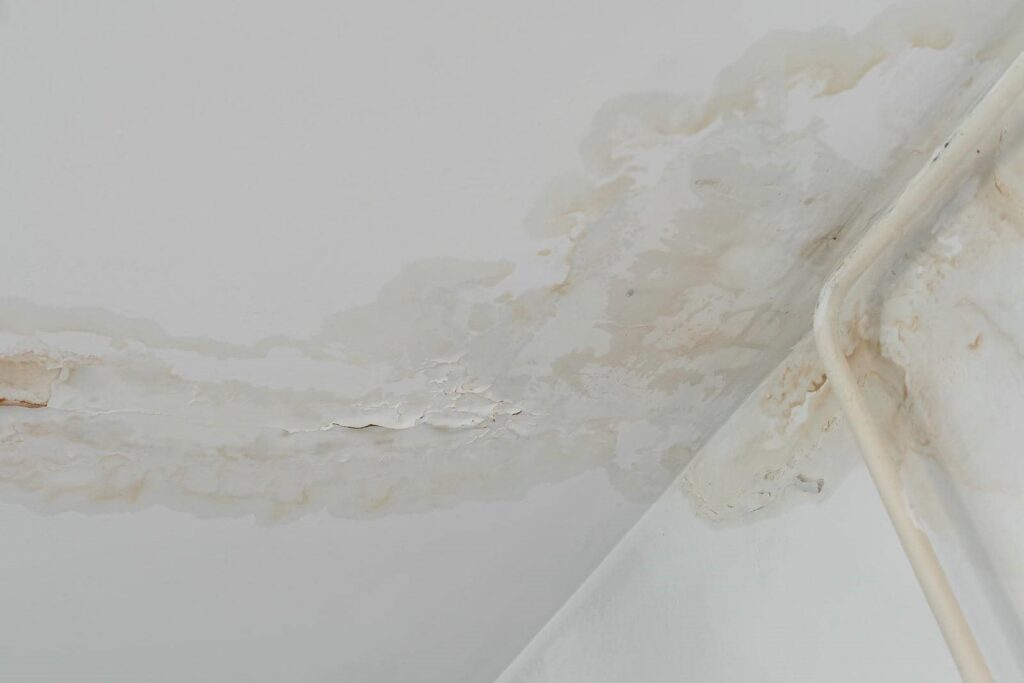
Ignoring the signs of ceiling water damage can lead to costly repairs and health risks. Look for water stains on your ceiling; these often indicate leaks from above.
Peeling paint and sagging ceilings are also clear red flags, signaling potential structural integrity issues. If you notice a musty odor, it might mean ceiling mold is developing, which can be harmful to your health.
Discoloration issues and drywall damage suggest ongoing moisture problems that could stem from insulation issues or hidden leak sources.
Don’t brush off these warning signs; addressing them early can save you from bigger headaches down the line. Stay proactive to protect your home and ensure a safe, comfortable living environment.
DIY Solutions for Ceiling Water Damage
When you notice water damage on your ceiling, the first step is evaluating how severe the issue is.
Knowing the extent of the damage helps you decide whether a temporary fix will suffice or if you need to call in a professional.
Let’s explore some practical DIY solutions that can help you tackle this problem right away.
Assessing Water Damage Severity
Although it might be tempting to overlook a discolored spot on your ceiling, evaluating the severity of water damage is essential to preventing further issues.
Start by identifying water damage indicators like stains, mold, or peeling paint. A careful severity assessment can save you time, money, and stress in the long run.
Consider these emotional impacts:
- Fear of hidden damage that could worsen over time
- Frustration from unexpected repairs disrupting your life
- Anxiety about the health risks of mold growth
- Worry about the impact on your home’s value
Taking these steps now can help you feel more secure and connected to your living space, ensuring it remains a safe haven for you and your loved ones.
Temporary Repair Techniques
If you notice water damage on your ceiling, tackling it promptly with temporary repair techniques can prevent further complications.
Start with leak sealing; identify the source of the water and apply a waterproof sealant to stop the flow.
Next, for visible damage, use temporary patching to cover any holes or cracks. You can use a piece of plastic sheeting or a drywall patch, securing it with adhesive or screws.
This protects your space and gives you time to plan for permanent repairs.
Remember, these DIY solutions are just stopgaps.
Sharing your experience with neighbors can help you find support and even tips for long-term fixes.
Don’t hesitate; acting fast keeps your home safe and sound!
Call a Professional for Water Damage Repair When…?
You should call a professional for water damage repair when extensive damage assessment is needed, as they can identify hidden issues that you might miss.
If you spot mold growth, it’s essential to get expert help immediately to prevent health risks.
Don’t wait—addressing these problems quickly can save you time and money in the long run.
Extensive Damage Assessment Needed
When water damage occurs, knowing when to call a professional for an extensive damage evaluation is vital. You might think a small leak is manageable, but hidden issues can escalate and lead to costly repairs.
Relying on damage appraisal techniques, experts can identify the full extent of the damage and help you with reviewing repair options.
Consider reaching out if you notice:
- Peeling paint or wallpaper
- Warped or sagging ceilings
- Unpleasant odors lingering in your home
- Increased humidity levels indoors
Taking prompt action can save you time and money while ensuring your home remains a safe and welcoming place.
Don’t hesitate to seek professional help; it’s a vital step in protecting your investment.
Mold Growth Is Present
Noticing mold growth in your home can be alarming, especially since it often indicates underlying water damage that needs immediate attention.
Mold isn’t just unsightly; it poses serious health risks, particularly for those with allergies or respiratory issues. You might think about tackling this issue yourself, but calling a professional for water damage repair is essential.
Experts can identify the source of moisture and ensure thorough mold removal, helping you implement effective mold prevention strategies. They’ll also advise you on maintaining a dry environment to prevent future growth.
Remember, addressing mold promptly protects your health and preserves your home’s integrity.
Don’t hesitate—take action now to keep your living space safe and comfortable.
Best Budget-Friendly Materials for Water Damage Ceiling Repair
Repairing a water-damaged ceiling doesn’t have to break the bank; several budget-friendly materials can get the job done effectively. You can restore your space without feeling overwhelmed by costs.
Here are some great options:
Drywall: Easy to install and repair, making it a go-to choice.
Plywood: A sturdy, cost-effective finish that can handle moisture.
Vinyl panels: Affordable and water-resistant, perfect for a stylish touch.
Budget insulation options: Helps prevent future damage while being wallet-friendly.
Using these materials, you’ll save money and create a cozy, welcoming atmosphere.
Don’t let water damage keep you down; with the right tools, you can bring your ceiling back to life!
How to Assess the Extent of Water Damage
To assess water damage effectively, start with a thorough visual inspection of your ceiling.
Look for stains, discoloration, or sagging areas that might indicate leaks.
Don’t forget to check for hidden moisture behind walls or in insulation, as this can worsen the problem if left unaddressed.
Visual Inspection Techniques
While water damage can be sneaky, an effective visual inspection can help you assess its extent before it worsens. Start by gathering your visual inspection tools; a flashlight and moisture meter can work wonders. Look for discoloration, stains, or warping on ceilings and walls.
Here are some effective techniques to guide your inspection:
Check for water stains: They often indicate past or present leaks.
Inspect joints and seams: These areas are vulnerable to damage.
Look for mold growth: It can signal hidden moisture.
Pay attention to odors: A musty smell can hint at trouble.
Taking these steps protects your home and fosters a sense of community care and belonging.
Identifying Hidden Moisture
After conducting a thorough visual inspection, the next step is identifying hidden moisture that can lead to extensive damage if left unchecked.
Start by using moisture detection tools like a moisture meter to pinpoint areas of concern. Check behind walls and ceilings where hidden leaks often lurk. Pay attention to any damp smells or discoloration in the paint and drywall, as these can signal trouble.
If you suspect hidden leaks, consider infrared cameras, which can reveal temperature differences indicating moisture. Don’t forget to inspect plumbing fixtures and appliances, as they’re common culprits.
What to Expect in Water Damage Repair Costs
When dealing with water damage, understanding the costs involved can make the process less intimidating. Knowing what to expect helps you plan your repair budget effectively, especially when maneuvering through water damage insurance claims.
Here’s what you might encounter:
Emergency services: Immediate response can prevent further damage.
Repair costs: Structural repairs, mold remediation, and restoration can add up.
Material expenses: Quality materials ensure longevity, but they come with a price.
Labor fees: Skilled professionals can expedite the process, but their expertise is an investment.
Smart Ways to Handle Water Damage on a Budget
Dealing with water damage can feel overwhelming, but you don’t have to break the bank to tackle it effectively.
Start by evaluating the damage and prioritizing repairs. Use budget restoration tips like DIY drying methods and simple cleaning solutions.
For repairs, consider cost-effective materials such as drywall, paint, and flooring that fit your budget while still looking great. Don’t hesitate to shop around for the best deals, whether online or at local hardware stores.
Also, you can often find second-hand or surplus materials that work just as well.
How to Navigate Insurance Claims for Water Damage
Managing insurance claims for water damage can be intimidating, especially if you’re unsure where to start.
To simplify the claim process, follow these steps:
Understand your insurance policy and what it covers.
Document the damage thoroughly with photos and notes.
Keep receipts for repairs to support your claim.
Be aware of your coverage limits to avoid surprises.
Resources for Finding Affordable Water Damage Restoration Services
Finding affordable water damage restoration services can feel overwhelming, but knowing where to look makes all the difference.
Start by tapping into community resources and local charities that often provide assistance or referrals. Online directories can help you compare costs among various service providers, making it easier to find the right fit for your budget.
Don’t overlook referral networks; friends and family might know reliable services they’ve used in the past. Additionally, explore government assistance programs that offer financial aid for home repairs.
By utilizing these resources, you can streamline your search and alleviate some stress, ensuring you find the help you need without breaking the bank.
Frequently Asked Questions
Can I Prevent Water Damage in My Ceiling Before It Occurs?
Yes, you can prevent ceiling water damage by using waterproofing techniques and scheduling regular inspections. Staying proactive helps you catch potential issues early, ensuring your space remains safe and cozy for you and your loved ones.
How Long Does It Take for Ceiling Water Damage to Appear?
“An ounce of prevention is worth a pound of cure.” Typically, you’ll notice ceiling water damage within a few days to weeks. Regular ceiling inspections and effective water leak detection can help catch issues early.
What Are the Health Risks Associated With Ceiling Water Damage?
Ceiling water damage can lead to mold exposure, causing respiratory issues and allergies. It also jeopardizes structural integrity, increasing safety risks. Addressing these problems quickly helps you maintain a healthy, secure living environment for everyone.
Are There Temporary Fixes for Ceiling Water Damage?
Think of temporary repairs as a band-aid for your ceiling. You can use waterproof tape or a tarp for quick solutions. These fixes won’t last forever, but they’ll help you manage the damage until permanent repairs occur.
How Do I Choose the Right Contractor for Ceiling Repairs?
To choose the right contractor, check their qualifications and experience. Request repair estimates from multiple professionals, ensuring they outline materials and labor costs. This helps you compare options and find someone you trust for your ceiling repairs.
Summary
In tackling ceiling water damage, you don’t have to break the bank. With a little effort and some smart choices, you can restore your ceiling and peace of mind. Think of it as a DIY adventure—one that saves money and gives you a sense of accomplishment. By staying proactive and informed, you can effectively turn a potential disaster into a manageable challenge. So, roll up your sleeves and start your repair journey today!