Dealing with ceiling water damage can be challenging, but knowing where to start makes it manageable. You need to identify the leak’s source and evaluate the damage carefully. Safety is paramount, so cutting the power is a must. With the right tools and techniques, you can address both minor and extensive issues effectively. But what steps should you take next to ensure a professional finish and prevent future problems? Let’s explore the essential tips you need.
Key Takeaways
- Inspect for leaks above the ceiling, checking bathrooms and kitchens for stains, mold, or other damage indicators.
- Ensure safety by cutting power to the affected area and using a voltage tester before starting repairs.
- Assess the extent of water damage; minor issues may only need patching, while extensive damage might require full replacement.
- Ventilate the area well to prevent mold growth and use mold-resistant materials during repairs for added protection.
- Consider professional help for extensive damage, especially if structural integrity or mold concerns arise; document everything for insurance claims.
Identify the Source of the Leak
Before you can tackle ceiling water damage, you need to identify the source of the leak. Start with leak detection by examining areas above your ceiling, like bathrooms or kitchens, where water sources are common.
Look for drips, stains, or mold that could signal an active leak. Check plumbing fixtures, pipes, and even roof areas for damage.
If you can’t find the source, consider using tools like moisture meters or infrared cameras for a more precise diagnosis.
Don’t hesitate to enlist a professional if needed; it’s essential to resolve the issue before making repairs.
Evaluate Water Damage Severity
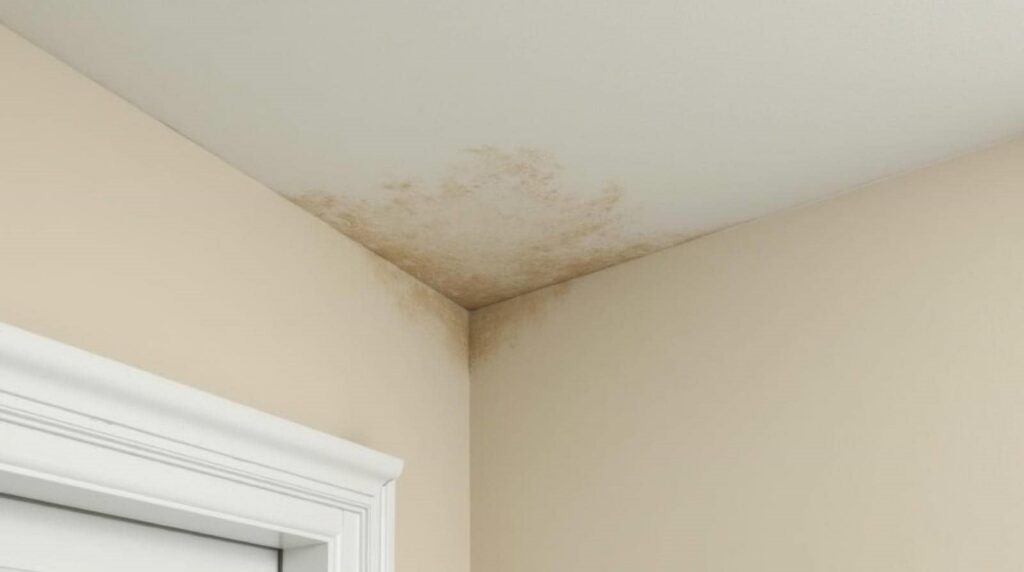
How can you accurately assess the severity of water damage in your ceiling? Start by looking for water damage indicators like discoloration, sagging, or peeling paint. These signs can help you gauge how extensive the damage might be.
Next, check for any mold growth or musty odors, which could indicate deeper issues.
If you notice any of these signs, consider the repair timeline; minor water stains may only require a quick touch-up, while extensive damage might need professional intervention.
Don’t forget to inspect the surrounding areas, as the source of the leak can affect other parts of your home.
Cut the Power Before Repairs
Cutting the power is an essential first step when tackling ceiling water damage repairs. Before you start, head to your electrical panel and switch off the circuit that powers the affected area.
This simple action is one of the most critical safety precautions you can take. Water and electricity don’t mix, and electrical hazards can lead to severe injuries or even worse.
Make certain to double-check that the power is off by using a voltage tester on any exposed wires. While it might seem like an extra step, taking the time to ensure your workspace is safe allows you to focus on the repair without worrying about unseen dangers.
Prioritizing safety will make your repair process smoother and more efficient.
Choose the Right Tools for Your Repair
When tackling ceiling water damage repairs, having the right tools can make all the difference in achieving a successful outcome. Start with essential tool types like a drywall saw, putty knife, and a paint roller for patching and finishing. A sturdy ladder is vital for reaching high areas safely.
Don’t forget a moisture meter to check for lingering dampness.
Once you’ve gathered your tools, focus on tool maintenance. Clean your tools after use and store them properly to ensure they’re ready for your next project.
Keeping your equipment in good shape enhances performance and extends its lifespan. With the right tools and maintenance, you’ll feel more confident and capable as you tackle your repair.
Thoroughly Dry the Affected Area
Start by thoroughly drying the affected area to prevent further damage and mold growth. Use moisture detection tools to identify damp spots and ensure you tackle every area that needs attention.
Begin with the basics: open windows and doors to improve air circulation. Fans can help, but consider dehumidifiers for more effective drying techniques.
If the damage is extensive, you might need to remove ceiling panels or insulation to reach hidden moisture. Regularly check for moisture levels to ensure your efforts are working.
Fix or Replace Ceiling Water Damage Materials
Once you’ve thoroughly dried the area, it’s time to assess the extent of the damage.
You’ll need to decide whether you can repair the drywall or if it’s better to replace it entirely.
Knowing when to fix versus replace can save you time and money in the long run.
Assess Damage Extent
How can you determine whether to fix or replace ceiling water damage materials? Start by evaluating the extent of the damage.
Look for discoloration, sagging, or mold. If it’s minor and localized, you might consider temporary solutions, like patching or sealing.
However, if you notice widespread damage or structural issues, replacement might be necessary.
It’s also wise to check your insurance claims policy; some damages may be covered, making replacement more feasible.
Don’t forget to document the damage with photos, which can help with your claims process.
Repairing Drywall Options
When faced with ceiling water damage, deciding whether to repair or replace drywall can be challenging.
Start by identifying the drywall type—standard, moisture-resistant, or mold-resistant. If the damage is minor, you might opt for repair techniques like patching with joint compound or using a drywall repair kit.
Simply cut out the affected area, apply the new piece, and finish it off with sanding for a smooth surface.
However, if the damage is extensive or the drywall shows signs of mold, replacement might be the safer choice.
Remember, your home deserves a solid ceiling, so weigh your options carefully and take action to restore your space.
Don’t hesitate to seek help if you feel unsure!
When to Replace Materials
Although it might be tempting to patch up damaged materials and call it a day, knowing when to replace them is essential for preventing future issues.
First, consider the material lifespan; if it’s nearing the end, replacement might be your best option. Look for replacement indicators like significant discoloration, mold growth, or sagging.
These signs often mean the damage is deeper than surface level. If you notice these issues, don’t hesitate to remove and replace the affected materials.
This proactive approach ensures your ceiling looks good and protects your home from further damage.
Implement Mold Prevention Techniques
To prevent mold growth after repairing ceiling water damage, you need to keep areas well-ventilated.
Open windows and use fans to promote airflow, especially in damp spaces.
Additionally, consider using mold-resistant materials during repairs to provide an extra layer of protection.
Keep Areas Well-Ventilated
Proper ventilation is essential for preventing mold growth in areas affected by water damage. To ensure effective air circulation, open windows and doors whenever possible to allow fresh air to flow in.
If it’s not practical to open windows, consider using fans or dehumidifiers to keep humidity levels low. These ventilation tips can make a significant difference in drying out the space and reducing moisture that fosters mold.
Additionally, check that vents and ducts are unobstructed, promoting better airflow throughout the room. Regularly inspect these areas to maintain ideal ventilation, creating a healthier environment for you and your loved ones.
Use Mold-Resistant Materials
When you’re repairing ceiling water damage, using mold-resistant materials can greatly reduce the risk of future mold growth. Opting for these materials helps create a healthier living environment for you and your loved ones.
Here are some key options to evaluate:
Mold-resistant paints: These paints contain antimicrobial properties, preventing mold from thriving on your ceilings.
Moisture barriers: Installing moisture barriers helps block water from infiltrating your ceiling, keeping it dry and mold-free.
Mold-resistant drywall: This type of drywall is specifically designed to resist moisture, making it an excellent choice for areas prone to humidity.
Repaint for a Seamless Finish
Repainting your ceiling can make a world of difference, especially after water damage. Start by ensuring your surface is clean and dry.
Choose a primer that seals any stains, providing a solid base for your new paint. When selecting your paint, focus on color matching; the right shade can help your ceiling blend seamlessly with adjacent walls.
If your ceiling has texture, consider texture blending techniques to replicate the original finish. Use a roller for large areas and a brush for corners to achieve an even application.
Don’t rush this process—allow each layer to dry completely before applying the next. With patience and attention to detail, you’ll restore your ceiling’s beauty, creating a warm and inviting space once again.
When to Call a Professional?
Although DIY repairs can be tempting, knowing when to call a professional for ceiling water damage is essential for achieving lasting results.
Here are key situations where you should reach out:
Extensive Damage: If the damage covers a large area or affects structural integrity, it’s time to get help.
Mold Growth: If you spot mold, professionals can safely handle the cleanup and prevent future issues.
Insurance Claims: A pro can assist with the documentation needed for insurance claims, ensuring you get the coverage you deserve.
In emergencies, quick response is vital.
Don’t hesitate to contact experts who can provide the necessary tools and expertise for a thorough repair.
You’ll feel more secure knowing the job is done right.
Future Preventative Measures
After addressing the immediate concerns of water damage, it’s important to focus on future preventative measures to protect your ceiling from similar issues.
Start by investing in water leak detection systems; these can alert you to leaks before they escalate. Regular maintenance is essential, so schedule periodic inspections of your roof, plumbing, and appliances.
Keep an eye on areas prone to moisture, like bathrooms and kitchens, and ensure proper ventilation to reduce humidity. If you notice any signs of wear or damage, address them immediately.
Frequently Asked Questions
How Long Does It Take for Ceiling Repairs to Dry Completely?
Ceiling repairs typically take 24 to 48 hours to dry completely, depending on your repair methods and environmental factors. Ensure proper ventilation to speed up drying time, so you can restore your space quickly.
Can I Use Regular Paint After Repairing Water Damage?
You can’t use regular paint on repaired water damage without proper surface preparation. Instead, opt for a stain-blocking primer first. This ensures the underlying issues don’t bleed through, keeping your ceiling looking fresh and vibrant.
What Is the Best Way to Test for Mold Growth?
To test for mold growth, look for growth indicators like discoloration or musty odors. You can use mold testing kits or hire professionals for accurate results, ensuring your space remains safe and healthy for everyone.
Will My Insurance Cover Water Damage Repairs?
Yes, your insurance might cover water damage repairs if you file claims promptly. Review your policy details, document the damage, and communicate with your insurer to ensure you receive the support you need during this process.
How Can I Prevent Future Leaks in My Ceiling?
To prevent future leaks, regularly inspect your roof for damage and ensure proper drainage. Utilize leak detection tools and maintain your gutters. Staying proactive helps you protect your home and creates a sense of community care.
Recap
Tackling ceiling water damage can seem intimidating, but with the right approach, you can restore your space effectively. Have you considered how a little prevention now can save you from major headaches later? By following these tips, you’ll repair the damage and protect your home from future issues. Stay proactive, ensure proper ventilation, and choose quality materials, and you’ll enjoy a seamless finish that lasts.