
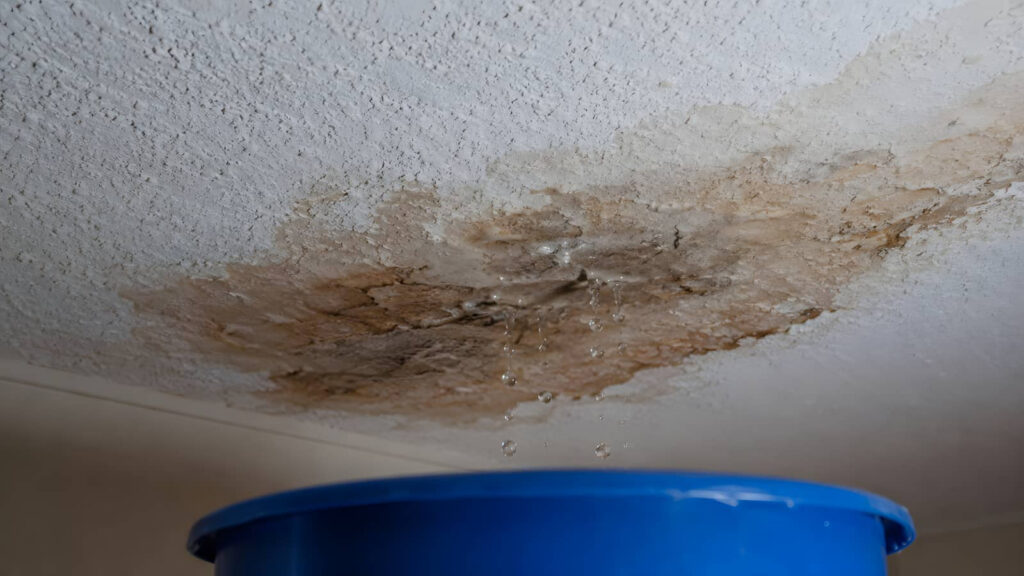
When you spot leak damage in your home, you need to act fast and in the right order. First, stop the source and protect the room from more water. Then check for hidden ceiling damage, mold, and weak drywall before you dry, clean, and repair anything. The tricky part is knowing what you can fix yourself and what needs attention now.
Key Takeaways
- Stop the leak immediately by shutting off water, catching drips, and protecting furniture and floors from further damage.
- Inspect ceilings, walls, and attic spaces for stains, sagging, bubbling paint, and musty odors to find hidden water damage.
- Dry the affected area completely with fans and a dehumidifier before making repairs or replacing damaged materials.
- Patch cracks, replace damaged drywall or insulation, then prime and repaint with stain-blocking products for a smooth finish.
- Prevent future leaks by maintaining roofs, gutters, plumbing, and checking vulnerable areas regularly for early warning signs.
Common Causes of Ceiling Water Damage
Ceiling water damage often starts with a leak you can’t see right away, but the source is usually straightforward to trace.
You’ll often find pipe bursts in hidden chases, roof leaks near valleys, or plumbing issues above bathrooms and kitchens.
Condensation buildup can drip from poorly insulated ducts or attic lines, while appliance malfunctions and appliance leaks may send water into ceilings below.
Outside, gutter overflow can push water back under shingles, and window leaks can travel through framing before showing up overhead.
When you know these common patterns, you can narrow the problem faster and feel less overwhelmed.
You’re not alone in this; most ceiling stains come from a handful of predictable failures, and each one leaves clues you can check carefully.
Stop the Leak and Protect the Room
Once you spot the source, shut off the water or isolate the failing line right away, then relieve pressure by opening a nearby faucet if the leak is plumbing-related.
Move quickly, but stay calm; you’re handling this like a pro. Catch drips with buckets, towels, and plastic sheeting, and pull furniture, rugs, and electronics out of the splash zone.
If you can, mark the wet area for leak detection later. Use fans only after the flow stops, and don’t leave porous items touching the floor.
For temporary protection, cover exposed surfaces with waterproof materials such as tarps or heavy-duty plastic. This buys you time and reduces spread while you prepare repairs.
You’re not dealing with this alone—steady steps now protect the room and make the next fix easier.
Assess Hidden Ceiling Damage
After you’ve stopped the leak, check the ceiling for hidden damage before you assume the area is safe.
Look for subtle sagging, hairline cracks, and discoloration around seams, vents, and light fixtures. Press gently near suspect areas; softness can signal trapped moisture or weakened drywall.
During ceiling inspections, you should also note any bubbling paint, peeling texture, or musty odors, since these are hidden signs that water reached deeper layers. Use a flashlight at an angle to reveal uneven surfaces and mapped stains.
If you spot movement, spreading stains, or a damp edge, mark the area and keep monitoring it with your household crew.
You’re not alone in this process; careful checking helps you protect your home and catch problems early.
Dry Ceiling Water Damage Fast
As soon as you’ve confirmed the leak is stopped, dry the ceiling fast to limit swelling, staining, and mold growth.
Start with strong airflow: run fans across the damp area and open nearby windows if humidity is low. Use a dehumidifier to pull moisture from the room, and keep it running until the surface feels dry.
If your ceiling materials are delicate, set equipment on a lower setting so you don’t spread damage. Check for cool spots with your hand or a moisture meter, because hidden dampness can linger above paint.
These drying techniques work best when you act within hours, not days. You’re not alone here—most homeowners can stabilize the area quickly with steady airflow, patience, and close monitoring.
Remove Soaked Drywall and Insulation
You should cut out any wet drywall past the visible damage so you remove all compromised material.
Then pull out soaked insulation and replace it, since saturated insulation won’t dry properly or protect the wall cavity.
This step helps you stop hidden moisture from spreading and sets you up for a clean repair.
Cut Out Wet Drywall
Start by cutting out any wet drywall and insulation so the damaged area can dry properly and mold can’t spread. You’ll want to trace the stain beyond the visible edge and remove all softened material with a utility knife.
Use a moisture assessment tool to confirm what’s still damp before you plan drywall replacement. Keep these steps in mind:
- Mark the cut line at least 12 inches past the damage.
- Score the drywall cleanly, then lift it away in sections.
- Bag debris right away to keep your space tidy.
- Inspect framing for hidden wet spots before closing the wall.
Work carefully, and you’ll protect the structure while making the repair easier.
You’re not alone in this process; many homeowners handle it successfully with patience and the right tools.
Replace Damaged Insulation
Once the wet drywall comes out, remove any soaked insulation and replace it only after the cavity dries completely. You’ll protect the wall assembly and avoid hidden mold by checking every stud bay, corner, and seam.
Different insulation types respond differently: fiberglass usually loses loft, while cellulose can clump and hold moisture. If the material smells musty, feels heavy, or shows staining, discard it.
Let the framing dry with airflow, dehumidification, and patience before you install fresh batts or blown-in fill. Match the new product to the original R-value and local code so your repair supports energy efficiency and keeps your home comfortable.
When you work carefully here, you’re restoring more than a wall—you’re helping your space feel solid, safe, and truly yours again.
Clean Mold After Ceiling Water Damage
Before you scrub anything, make sure the ceiling leak is fully stopped and the area is dry, because mold can keep spreading in damp materials.
For mold removal, you’ll want to work carefully and protect yourself. Use these safety precautions and stay confident:
- Wear gloves, an N95 mask, and eye protection.
- Seal the room to limit spore spread.
- Wipe small patches with detergent and water.
- Dry the area completely with fans or ventilation.
If the mold covers more than a few square feet, call a pro you can trust.
Don’t mix cleaners, and don’t sand or scrape aggressively, since that can release more spores.
Keep checking nearby surfaces for hidden growth so you and your home stay on the right track.
Repair Ceiling Stains, Cracks, and Sagging
Start by checking the ceiling for brown stains, hairline cracks, and any areas that look soft or bowed, since these signs show where water once pooled.
You can clean and seal stains after the area is fully dry, then patch cracks with joint compound and tape for a smooth finish.
If a section is sagging, support it first, remove damaged material, and replace it so the ceiling stays stable and safe.
Identifying Water Stains
How do you spot water damage before it worsens? You can identify water stain types by color, shape, and spread: yellow rings often signal slow leaks, brown patches suggest older moisture, and dark edges point to active seepage. By identifying sources, you’ll narrow down whether the problem comes from roofing, plumbing, or condensation.
Stay with the process:
- Check ceilings under bathrooms and attics.
- Compare stain size after rain.
- Feel for cool, damp drywall.
- Look for nearby mold or peeling paint.
You’re not alone in this; many homeowners catch damage early with a careful walkthrough. Document each stain with photos, note dates, and track changes. This helps you act quickly, protect your space, and feel confident before repairs begin.
Repairing Ceiling Cracks
Once you’ve traced the leak, you can repair ceiling cracks, stains, and sagging by first stopping any remaining moisture and then evaluating the damage.
Check the crack patterns to see whether they’re hairline, joint-related, or spreading from a weakened seam. Scrape away loose paint, then widen narrow cracks slightly so filler can bond well.
Match your patching compound to the ceiling materials, whether drywall, plaster, or textured finish. Apply joint compound in thin coats, feathering each layer beyond the crack edge.
After it dries, sand smooth, prime the area, and repaint with a stain-blocking product. If you’re part of a crew tackling the same issue, stay consistent with tools and drying times so the repair blends cleanly and lasts.
Fixing Sagging Sections
If the ceiling is sagging, you’ll need to relieve the load, stop any remaining moisture, and inspect the area before you repair it. You’re not alone here; this happens after leaks weaken drywall, plaster, or framing.
Remove soaked insulation and damaged finish materials.
Dry the cavity with fans and a dehumidifier.
Check joists, fasteners, and connections for deflection.
Add structural support with sisters, blocking, or a temporary brace.
Use repair techniques that match the material: resecure loose boards, replace compromised panels, then tape, mud, and sand the seam.
If you see ongoing movement, call a pro before closing it up. Once the structure feels solid, you can restore the surface with confidence and protect your home’s interior again.
Repaint a Ceiling After Water Damage
After the ceiling is fully dry and the stain is sealed, you can repaint it to restore a clean, even finish.
Start by lightly sanding patched areas so the surface blends smoothly with surrounding drywall. Wipe away dust, then apply a primer suited for stains and new repairs.
Choose matching ceiling paint with a flat sheen to hide minor texture differences. If you’re blending older work, feather the paint beyond the repair edge with a roller to avoid harsh lines.
Use two thin coats instead of one heavy coat for better coverage and fewer lap marks. These repair techniques help you get a consistent result that feels professional and calm.
With careful prep and steady application, your ceiling can look like it belongs again.
Prevent Future Ceiling Leaks
A fresh coat can make a repaired ceiling look whole again, but stopping the leak at its source is what protects that work. You’ll keep your home safer when you inspect vulnerable systems before small issues grow.
Regular roof maintenance and plumbing checks help you catch cracked flashing, loose shingles, sweating pipes, and failing caulk early. Stay with this routine, and you’ll feel more in control.
- Inspect the attic after heavy rain.
- Clear gutters and downspouts.
- Test supply lines, shutoff valves, and seals.
- Schedule seasonal roof and plumbing checks.
If you spot stains, musty odors, or soft drywall, act quickly. Tighten, seal, or replace damaged parts, and call a pro when the source isn’t obvious.
That’s how you protect your space and your peace of mind.
Frequently Asked Questions
How Do I Document Damage for an Insurance Claim?
Photograph everything, note dates, list affected items, and keep receipts. Include a damage assessment and submit it through your claim process. You’ll stay organized, supported, and ready while your insurer reviews your claim.
When Should I Call a Structural Engineer?
Call a structural engineer when you notice sagging floors, cracked walls, or shifting foundations. You’ll protect structural integrity with a prompt engineer assessment, and you’re not alone—this step gives you clear, practical reassurance.
Can I Stay Home During Ceiling Water Damage Repairs?
Yes, you can often stay home during ceiling water damage repairs if you follow safety precautions and confirm repair timelines. You’ll want to avoid affected rooms, control dust, and stay alert for electrical or structural hazards.
How Much Does Professional Leak Detection Usually Cost?
You’ll usually pay $150–$500 for professional leak detection. Why guess? Cost factors include home size and access, while detection methods like acoustic listening and thermal imaging can raise or lower your price.
What Emergency Supplies Should I Keep for Future Leaks?
You should keep emergency kits with towels, buckets, a wet/dry vacuum, plumber’s tape, flashlight, gloves, and a wrench. For leak prevention, add pipe insulation, shutoff labels, and plastic sheeting; you’ll feel prepared and supported.
Recap
You can fix leak damage in your home by moving fast, working methodically, and checking for hidden issues. Remember, a small drip can waste over 3,000 gallons of water a year, so catching leaks early matters. Stop the source, dry the area, remove damaged materials, and repair stains or sagging before repainting. Then keep inspecting plumbing, roofs, and ceilings regularly so you don’t face the same damage again.