You might think fixing ceiling water damage is a challenging task, but it’s manageable with the right approach. First, you’ll need to pinpoint the leak and address it before tackling the visible damage. Understanding how to assess the situation and execute repairs can save you time and money. Let’s explore the steps you need to take to restore your ceiling effectively and ensure it stays in good condition for years to come.
Key Takeaways
- Identify and repair the source of the leak to prevent further water damage.
- Assess the extent of damage; minor issues can be patched, while severe damage may require replacing materials.
- Turn off power to affected areas to ensure safety before beginning repairs.
- Use appropriate materials and techniques for repairs, including sealing compounds or new drywall as needed.
- Repaint the ceiling after repairs to restore its appearance and blend with existing decor.
Understanding the Causes of Ceiling Water Damage
If you notice unexplained stains or peeling paint, it might be time for moisture detection. This process helps identify hidden leaks and excess humidity before they escalate. Regularly inspect areas prone to water exposure, like bathrooms and kitchens, to catch problems early.
How to Spot Water Damage in Your Ceiling
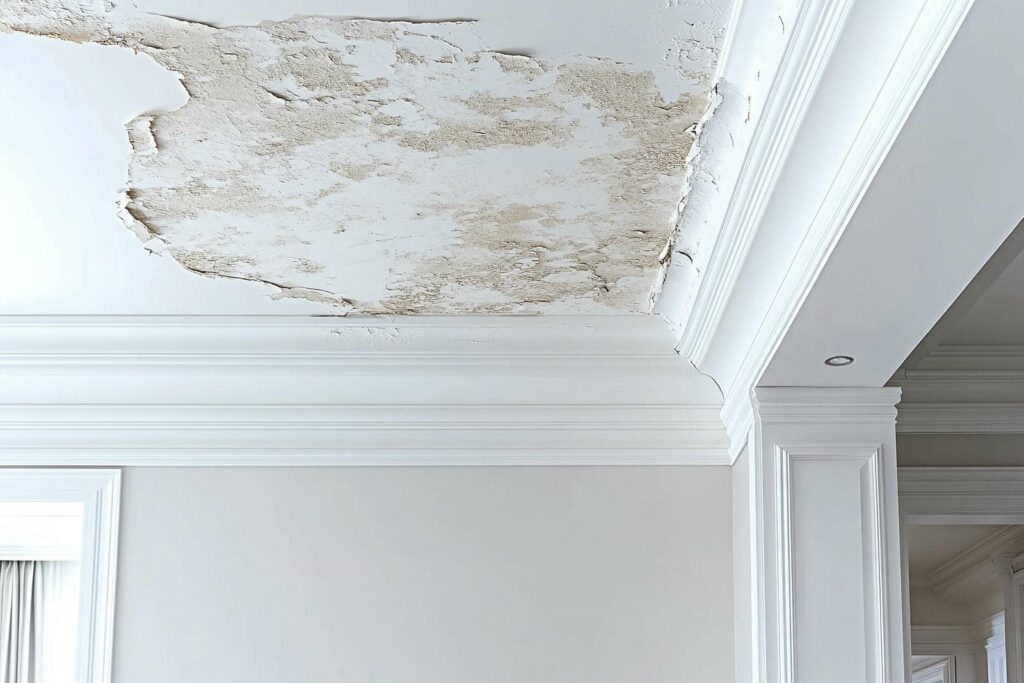
Have you noticed any unusual marks or discoloration on your ceiling? These could be signs of water damage.
Start by checking for water stains, which often appear as yellow or brownish patches. If you see these, it’s a signal that moisture is seeping in.
Next, look for peeling paint or bubbling in the surface; these indicate that the paint is losing its adherence due to underlying moisture.
Don’t overlook soft spots or sagging areas, as they can suggest more serious damage.
Regularly inspecting your ceiling will help you catch problems early, ensuring a safe and cozy home environment.
Safety Precautions Before Starting Repairs
Before you start repairs, it’s essential to assess any potential electrical hazards caused by water damage.
Make sure to turn off the power to the affected area and check for exposed wires.
Always wear protective gear, like gloves and goggles, to keep yourself safe from debris and contaminants.
Assess Electrical Hazards First
As you prepare to tackle ceiling water damage, ensuring your safety should be your top priority, especially when it comes to potential electrical hazards.
Start by turning off the power to affected areas at the main circuit breaker. This step is essential for electrical safety.
Next, conduct a thorough circuit inspection to identify any damaged wiring or outlets that may be compromised by moisture. Look for signs of fraying, discoloration, or corrosion.
If you find any issues, it’s best to consult a licensed electrician before proceeding with repairs.
Wear Protective Gear Always
When tackling ceiling water damage, wearing protective gear is essential for your safety. Start with a sturdy pair of gloves to shield your hands from sharp debris and mold. Goggles are a must to protect your eyes from dust and potential contaminants.
A mask can help filter out harmful particles, especially if you’re dealing with moldy areas. Don’t forget a hard hat if there’s a risk of falling debris. Additionally, durable clothing can prevent scrapes and keep you comfortable while working.
How to Repair Water-Damaged Ceilings: A Step-by-Step Guide
Repairing water-damaged ceilings can seem challenging, but breaking it down into manageable steps makes the process straightforward.
First, identify the source of the leak and fix it to prevent further damage.
Next, assess the extent of the damage to your ceiling materials. For minor damage, you can use repair techniques like patching small holes or applying a sealing compound.
If the damage is extensive, consider replacing sections of drywall or ceiling tiles. Make certain you choose appropriate ceiling materials that match your existing decor.
After repairs, repaint the ceiling to blend everything seamlessly.
Gather Your Tools and Materials for the Repair
Before diving into your ceiling repair, it’s essential to gather the right tools and materials. First, collect your repair tools: a putty knife, a drywall saw, and a sanding block. You’ll also need a drill and screws for mounting new materials.
Next, choose your material types carefully. If you’re repairing drywall, opt for moisture-resistant boards to prevent future issues. For patching, joint compound works wonders, and don’t forget a primer and paint to finish the job.
Having these items on hand streamlines your repair process and ensures you feel confident and connected to your home. With the right tools and materials, you’re ready to tackle that ceiling like a pro!
Preventing Future Water Damage in Your Ceiling
To keep your ceiling safe from future water damage, it’s crucial to identify and address potential sources of leaks before they become a problem.
Start with regular water leak detection in areas prone to moisture, like bathrooms and kitchens. Inspect pipes and fixtures for signs of wear or corrosion.
Installing moisture barriers in your attic and around windows can greatly reduce humidity levels and prevent water seepage.
Verify gutters and downspouts are clear to direct rainwater away from your home’s foundation.
Finally, maintain your roof by checking for missing shingles or damage.
Signs You Need a Professional for Water Damage Repairs?
If you notice extensive staining and discoloration on your ceiling, it’s a clear signal that professional help may be needed.
Mold growth and persistent odors aren’t just unpleasant; they can pose serious health risks.
Additionally, if you’re concerned about the structural integrity of your ceiling, don’t hesitate to call in an expert to assess the damage.
Extensive Staining and Discoloration
When you notice extensive staining and discoloration on your ceiling, it’s often a clear sign that water damage has occurred, and ignoring it could lead to more severe problems.
Different staining patterns can reveal the source of the issue, whether it’s a leaky roof, plumbing failure, or condensation. Understanding discoloration causes is essential for addressing the problem effectively.
If the stains are widespread or changing, it’s a strong indication that the damage is more than just cosmetic.
You might think about tackling it yourself, but calling in a professional can save you time and ensure a thorough repair. They’ll fix the visible damage and identify and rectify the underlying issues before they escalate.
Mold Growth and Odors
Mold growth and lingering odors often signal that water damage isn’t just superficial, but rather a deeper issue that requires immediate attention.
If you notice these signs, it’s time to contemplate professional help. Ignoring the problem can lead to health risks and further damage.
Here are some key points to recognize:
- Persistent musty smells could indicate hidden mold.
- Visible mold spots on walls or ceilings are a clear sign you need assistance.
- Increased respiratory issues among household members may suggest mold exposure.
To combat these issues, use mold prevention techniques like maintaining proper ventilation and addressing leaks quickly.
For odor removal methods, contemplate professional-grade air purifiers and specialized cleaning solutions to effectively restore your space.
Structural Integrity Concerns
Water damage can compromise the structural integrity of your home, making it essential to recognize the signs that indicate you need professional repairs.
Look for sagging ceilings or walls, which may signal load-bearing concerns. If you notice cracks in the drywall or mold growth, these are red flags that shouldn’t be ignored.
Water can weaken beams and supports, leading to long-term implications that can escalate quickly. If the damage appears extensive or if you’re unsure about the severity, it’s best to call in professionals.
They can assess the situation, determine necessary repairs, and ensure your home remains safe and sound.
Don’t wait until minor issues become major headaches; addressing them early can save you time and money.
Tips for Selecting a Reliable Water Damage Restoration Company
How can you ensure you choose the right water damage restoration company? Start by researching reputable contractors in your area. Look for those with strong customer reviews that highlight their reliability and effectiveness.
Here are a few tips to help you make the best choice:
Check Credentials: Confirm the company is licensed and insured. This protects you and shows professionalism.
Ask for References: Speak with past clients to gauge their experiences. A trustworthy company will willingly provide this information.
Evaluate Response Time: Quick action is essential in water damage situations. A reliable company should be available 24/7.
Cost of Water Damage Ceiling Repair
When facing ceiling water damage, understanding the costs involved is vital for effective planning.
Repair costs can vary widely, typically ranging from $300 to $1,500, depending on the extent of the damage and the materials needed.
It’s important to assess your insurance coverage, as many policies may help cover these expenses. Check your policy details to see what’s included, as this can greatly reduce your out-of-pocket costs.
Don’t forget to factor in additional expenses like mold remediation or repainting, which can add to the total.
Frequently Asked Questions
Can I Repair Water Damage Without Professional Help?
Yes, you can repair water damage without professional help. Start with a thorough damage assessment, then tackle DIY repairs by sealing leaks and replacing affected materials. Just make certain you follow safety guidelines and use the right tools.
How Long Does It Take to Repair Ceiling Water Damage?
Repairing ceiling water damage typically takes a few days to a week, depending on the severity. Consider the restoration timeline and repair costs, as these factors can affect your overall experience and satisfaction.
What Types of Ceilings Are Most Affected by Water Damage?
Drywall types, especially those in kitchens and bathrooms, are most affected by water damage. Other ceiling materials like plaster and acoustic tiles can also suffer, leading to unsightly stains and structural issues if not addressed promptly.
Will My Insurance Cover Ceiling Water Damage Repairs?
Yes, your insurance might cover ceiling water damage repairs, but it depends on your insurance policies and coverage limits. Review your policy details or consult your agent to understand what’s included and any exclusions.
How Can I Recognize Mold Growth After Water Damage?
You can recognize mold growth after water damage by checking for discoloration, musty odors, and visible spots. Focus on mold prevention and moisture control to keep your space healthy and safe for everyone.
Review
Tackling ceiling water damage might feel like a monumental task, but it doesn’t have to be a Herculean effort! By following these steps, you can transform a sagging, stained ceiling into a pristine masterpiece. Remember, a stitch in time saves nine—so don’t let a small leak turn into a waterfall! Stay vigilant, keep the tools handy, and take charge of your home’s health. You’ve got this; your ceiling will thank you!