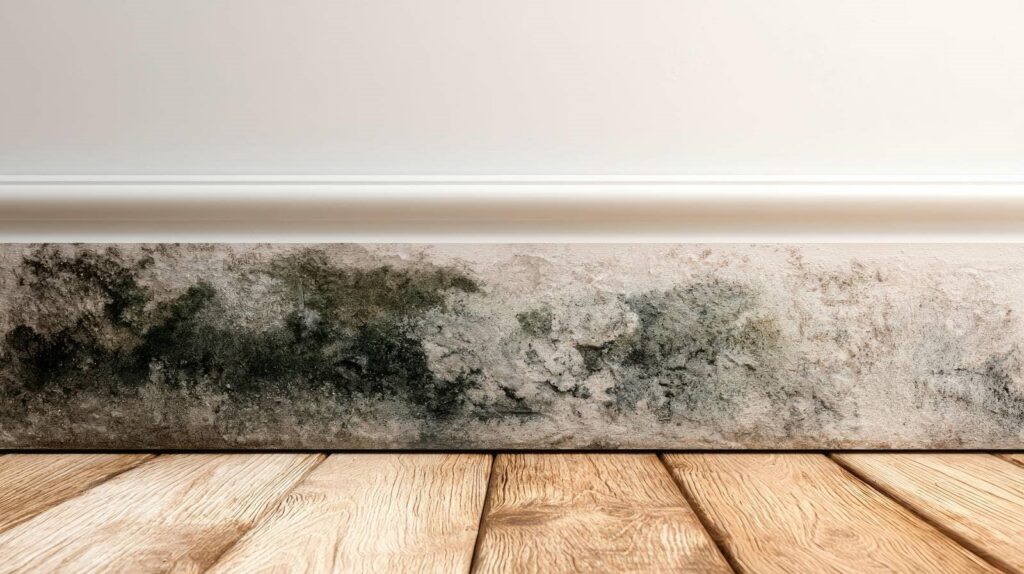
After experiencing water damage, you need to act quickly to prevent Mold After Water Damage from becoming a serious issue. Start by addressing the source of the water and removing any standing water. This initial response is vital. Next, thoroughly dry the affected areas within 24 to 48 hours using fans and dehumidifiers. However, the process doesn’t end there. Choosing moisture-resistant materials for repairs, cleaning and disinfecting surfaces, and monitoring humidity levels can make a significant difference in protecting your home and preventing future mold growth.
Key Takeaways
- Quickly remove standing water and moisture using pumps and wet vacuums within the first 24 hours.
- Use fans and dehumidifiers to promote airflow and maintain humidity levels between 30% and 60%.
- Inspect hidden areas for dampness with moisture meters and address any issues immediately.
- Choose mold-resistant materials during repairs, such as treated wood and moisture-resistant drywall.
- Conduct regular inspections every 3 to 6 months to detect early signs of mold growth.
First Steps After Water Exposure
When water exposure occurs, it’s vital to act quickly to minimize damage and prevent mold growth. Your initial response should focus on evaluating the situation.
Start by identifying the source of the water and shutting it off if possible. Next, remove any standing water using pumps or wet vacuums; this is a significant immediate action.
Make sure you’re wearing protective gear, like gloves and masks, to safeguard against contaminants.
Afterward, ventilate the area by opening windows and using fans to promote air circulation. It’s important to dry out materials within 24-48 hours to inhibit mold development.
Document the damage for insurance purposes, and consider contacting professionals who specialize in water damage restoration for thorough assistance.
How to Effectively Remove Water to Prevent Mold
Act quickly to remove water effectively and reduce the risk of mold. Begin with water extraction using a wet/dry vacuum or a pump, targeting the most affected areas. Confirm you extract as much water as possible within the first 24 hours.
Next, implement drying techniques such as setting up fans and dehumidifiers to enhance airflow and reduce moisture levels. Open windows and doors to promote ventilation, if weather permits.
Inspect hidden areas like behind walls and under carpets; moisture can linger there. Using moisture meters can help verify that all areas are adequately dried.
How Long Should You Dry Areas After Water Exposure?
When dealing with water exposure, you’ll need to adhere to an ideal drying timeframe to effectively prevent mold growth.
Factors such as humidity levels, temperature, and the materials involved can greatly impact how long drying takes.
Understanding these parameters ensures you achieve thorough drying and minimize the risk of mold proliferation.
Ideal Drying Timeframe
To effectively prevent mold growth after water exposure, it’s important to dry affected areas promptly and thoroughly. Ideally, you should aim to dry spaces within 24 to 48 hours. This timeframe minimizes the risk of mold developing, especially in areas with high humidity.
Utilize drying equipment such as dehumidifiers and fans to expedite the process. Monitor the humidity levels, aiming for an ideal humidity of 30% to 60%. Regularly check surfaces for dampness; even slight moisture can lead to mold.
Factors Affecting Drying Duration
Various factors influence how long you should dry areas after water exposure. First, the type of material affected plays an important role; porous materials like drywall absorb moisture more readily than non-porous surfaces.
Next, the effectiveness of your drying techniques is critical. Utilizing fans, dehumidifiers, and heat can greatly accelerate the drying process. Humidity control is equally important; higher humidity levels can prolong drying time, so keeping the environment well-ventilated is necessary.
Additionally, the extent of water damage determines how long it takes to dry thoroughly. Monitoring moisture levels with a hygrometer can help you assess progress, ensuring you achieve the best results and prevent mold growth effectively.
Stay proactive, and you’ll foster a safer, healthier environment.
Choosing Mold-Resistant Materials for Repairs
Choosing the right materials for repairs is essential, especially after experiencing water damage, as it can greatly reduce the risk of mold growth. Start with mold-resistant paints, which create a protective layer on surfaces, preventing moisture penetration. These paints inhibit mold spores and enhance durability, ensuring long-lasting results.
Incorporate moisture barriers in your repairs, particularly in areas prone to dampness, like basements or bathrooms. These barriers act as a shield, blocking moisture from reaching structural components.
When selecting materials, opt for products specifically designed for high humidity environments, like moisture-resistant drywall or treated wood.
Regular Inspections to Catch Mold Early
To effectively prevent mold growth, you need to schedule routine inspections of your property.
Focus on identifying hidden moisture sources that could foster mold development, especially in areas prone to dampness.
Schedule Routine Inspections
While it might seem tedious, scheduling routine inspections can be your best defense against mold growth after water damage. By establishing a consistent inspection frequency—ideally every 3 to 6 months—you can proactively identify potential issues before they escalate.
During these inspections, focus on areas prone to moisture, such as basements, attics, and around appliances. Look for early signs of mold, like discoloration or a musty odor. Don’t overlook ventilation systems, as they can harbor hidden spores.
Identify Hidden Moisture Sources
How can you effectively identify hidden moisture sources in your home? Start by investing in moisture detection tools like hygrometers and thermal imaging cameras. These devices help you pinpoint hidden leaks behind walls, under floors, or in ceilings.
Regularly inspect areas prone to moisture, such as basements, attics, and around appliances. Look for discoloration, peeling paint, or a musty smell—these signs often indicate hidden leaks. Don’t forget to check plumbing fixtures and pipes, as even minor drips can lead to significant issues over time.
Creating a routine inspection schedule helps you catch problems early and fosters a sense of community by encouraging shared knowledge about mold prevention among neighbors. Stay proactive and protect your home!
Inspect High-Risk Areas
Regular inspections of high-risk areas in your home are essential for catching mold early. Focus on locations like bathrooms, kitchens, and basements where moisture often accumulates.
Look for signs of mold growth, such as discoloration or a musty odor. Use a moisture meter to check humidity levels; ideally, they should stay below 60%.
Don’t overlook hidden spots behind appliances or under sinks, as these can harbor dampness. Implementing moisture control measures, like using exhaust fans and dehumidifiers, further reduces risks.
Schedule inspections every few months to ensure you maintain a safe environment. By staying vigilant, you protect your home and foster a sense of community by keeping your living space healthy for everyone.
Key Signs You Should Hire Water Damage Professionals
When you notice persistent water stains on walls or ceilings, it’s essential to act swiftly, as these could indicate deeper issues that require professional intervention.
If you detect a musty odor, it’s a clear sign that mold may be developing, warranting a professional assessment.
Additionally, if your floors feel spongy or warped, it suggests significant water damage that may compromise structural integrity.
Pay attention to increased humidity levels, which can help mold thrive.
Finally, if you’ve experienced flooding or a major leak, don’t underestimate the potential for hidden damage.
Engaging water damage professionals ensures a thorough inspection and remediation, safeguarding your home and your health from further complications.
Frequently Asked Questions
Can I Use a Household Fan to Dry Wet Areas Effectively?
Yes, you can use a household fan for effective drying. Enhance air circulation and implement ventilation strategies to minimize moisture. Position fans to optimize airflow, ensuring wet areas dry quickly and mold growth is prevented.
What Types of Dehumidifiers Work Best for Mold Prevention?
For effective mold prevention, consider refrigerant dehumidifiers for larger areas and desiccant models for colder spaces. Both types provide excellent moisture control, ensuring your environment stays dry and mold-free, creating a healthier atmosphere for everyone.
How Can I Tell if Mold Is Hidden Behind Walls?
You can tell if mold is hidden behind walls by checking for mold indicators like musty odors, stains, or peeling paint. Using moisture detection tools helps identify damp areas, confirming potential hidden mold growth.
Are There Specific Plants That Help Absorb Excess Moisture?
While you’re channeling your inner botanist, consider moisture-absorbing plants like peace lilies and spider plants. They act as natural mold deterrents, helping maintain indoor humidity levels and creating a healthier living environment for you.
What Should I Do if I Find Mold During Renovations?
If you find mold during renovations, prioritize mold removal immediately. Seal off the area, ensure proper ventilation, and use protective gear. Follow renovation tips to prevent future growth, like maintaining low humidity and repairing leaks promptly.
Final Thoughts
In the battle against mold after water damage, acting swiftly is key. By promptly removing water, ensuring thorough drying, and using mold-resistant materials, you can keep mold at bay. Regular inspections help catch issues before they spiral out of control. Remember, an ounce of prevention is worth a pound of cure. So, take these steps seriously, and don’t hesitate to call in professionals if you suspect a problem. Your home—and health—will thank you.