
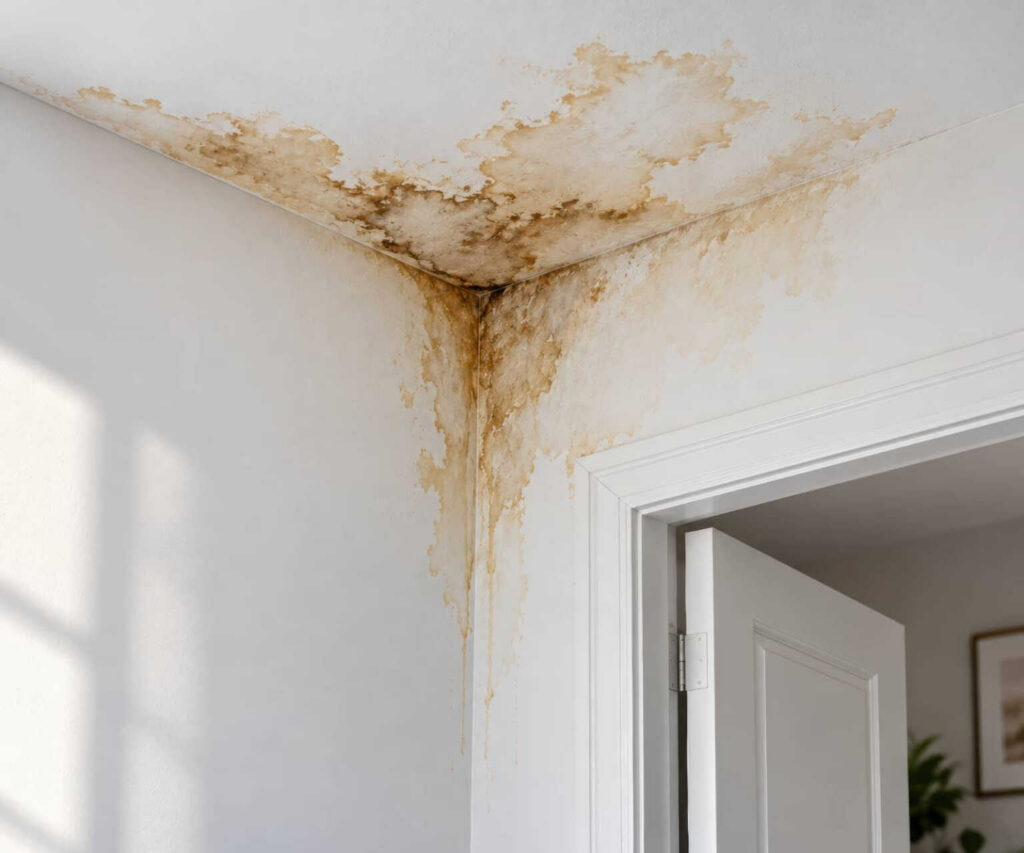
Ceiling Damage Repair starts with acting quickly when you notice a stain, sagging spot, or peeling paint on your ceiling. You’ll want to track down the leak, check how far the moisture has traveled, and decide what can be dried, patched, or replaced. The right repair depends on what you find, and the next steps may be simpler than you expect or more urgent than they look.
Key Takeaways
- Find and fix the water source first by checking the attic, plumbing lines, roof penetrations, vents, and moisture levels.d
- Inspect the ceiling for stains, peeling paint, soft spots, dripping, and signs of hidden water damage.
- Remove all wet drywall, insulation, or ceiling tiles, then dry the area completely before repairing.
- Patch minor damage with stain-blocking primer, joint compound, sanding, and matching paint after the leak is stopped.
- Call a professional if damage spreads, mold appears, drywall sags, or electrical fixtures are affected.
Find the Damage and Stop the Leak
Start by locating the source of the ceiling damage, because the visible stain is often only part of the problem. You need to act fast, since a leak can spread behind the surface and weaken nearby materials.
Begin with leak detection in the attic, around plumbing runs, roof penetrations, and vents. Look for wet framing, dripping insulation, or active water paths. If the source isn’t obvious, shut off nearby water supply lines and watch for change.
A careful moisture assessment helps you confirm where water is entering and whether the damage is still active. Once you identify the source, stop the leak right away or call a qualified pro.
When you handle this step early, you protect your home and join the group of owners who fix problems before they grow.
Inspect the Ceiling Water Damage
Inspect the ceiling for discoloration, such as yellow stains, brown rings, or peeling paint, since these signs often show where water has spread.
Check for any active leaks by looking for damp spots, dripping, or soft areas in the surface.
If you find either, mark the affected area so you can plan the repair accurately.
Spot Discoloration Signs
Faint rings, yellowing patches, and brown spots often give away ceiling water damage before the surface sags or peels. You should compare each mark with the surrounding finish and note whether the color looks fresh, faded, or uneven.
These discoloration causes often include past moisture intrusion, mineral staining, and old repair work. When you spot a patch, document its size and shape so you can track changes over time. Look for soft edges, repeated rings, or paint that no longer matches nearby areas.
Good prevention tips include checking attic insulation, keeping vents clear, and maintaining consistent indoor humidity. By staying alert, you’ll catch damage early and feel confident your home’s ceiling is under control.
Check For Active Leaks
Once you’ve noted stains and rings, check whether the ceiling damage is still active by looking for dampness, dripping, or a cool, soft area around the mark.
Press gently with a clean hand or towel; if moisture transfers, treat it as an ongoing leak.
Use leak detection methods to trace the source above the ceiling, including fixtures, pipes, and nearby roof penetrations.
If you suspect plumbing, schedule a plumbing inspection right away so you can stop the problem before it spreads.
Keep clear of sagging drywall and electrical fixtures.
Take photos, mark any changes, and monitor the area daily.
When you act quickly, you protect your home and stay on the right side of repair decisions with confidence.
Remove Wet Materials and Dry the Area
Remove any wet insulation, drywall, or ceiling tiles that can’t dry properly, since trapped moisture can lead to mold and further damage.
Then dry the area with fans, dehumidifiers, and good ventilation to speed evaporation and protect the surrounding structure.
Keep checking the ceiling until it’s fully dry before you move on to repairs.
Remove Damaged Materials
Before you repair the ceiling, strip out any wet or damaged materials so the area can dry properly. Put on safety precautions first: wear gloves, eye protection, and a mask before you touch insulation, drywall, or loose debris.
Work methodically so you stay in control and protect the rest of your home.
- Cut away sagging drywall or ceiling tiles with a utility knife.
- Bag soaked insulation, crumbling plaster, and debris for prompt material disposal.
- Check nearby framing and edges for soft spots, then remove anything compromised.
You’re not just cleaning up; you’re setting up a solid repair. Keep the space organized, avoid shaking loose dust, and leave only sound, dry surfaces behind.
This helps your crew—or you—move forward with confidence and less hassle.
Dry the Ceiling Area
Now that you’ve cleared out damaged materials, focus on drying the ceiling area completely so hidden moisture doesn’t cause more trouble.
Open windows and run fans to improve ceiling ventilation, and use a dehumidifier if the room stays damp.
Check insulation, framing, and adjacent drywall for trapped water, then remove anything that still feels wet.
Keep airflow steady until every surface feels dry to the touch.
If you can safely access the space above the ceiling, inspect it too and wipe away standing water.
Good moisture control now helps you prevent mold, staining, and future repairs.
Stay patient, keep the area monitored, and don’t close it up until the materials are fully dry and stable for the next repair step.
Repair Small Ceiling Water Damage
Once the leak is fixed and the ceiling is fully dry, you can repair small water damage with a simple patch-and-paint process.
Scrape away loose paint, then lightly sand the stained area so the surface blends cleanly. For mold prevention, wipe the spot with a mild cleaner and let it dry again. Good ceiling maintenance starts with careful prep and a close eye on edges.
- Apply a thin coat of stain-blocking primer.
- Fill minor dents with lightweight joint compound.
- Sand smooth, then match the paint.
Use a small roller or brush for even coverage, and feather the paint beyond the repair so it disappears into the surrounding ceiling.
You’ve got this—your ceiling can look cared for and whole again.
Replace Sagging Drywall and Insulation
If the ceiling feels soft, bowed, or crumbly, you’ll need to remove the damaged drywall and replace any wet insulation before patching the area.
Cut back to solid framing, then pull down loose material and bag it right away. Inspect the joists for stains, mold, or rot, and let the cavity dry fully.
Choose replacement boards that match the existing thickness, then fasten them securely for clean drywall installation.
When you handle insulation selection, pick material that suits your climate and fits snugly without compression.
Restore the cavity in layers, keeping edges tight and seams aligned. You’re not just fixing damage; you’re rebuilding a safe, comfortable ceiling your home can count on.
Prime and Paint the Ceiling
With the ceiling repairs complete and fully dry, apply a quality primer to seal the patched areas and help the finish coat bond evenly.
Choose primer selection based on the ceiling surface and any stains you’ve covered so you can create a uniform base.
Then follow these steps:
- Cut in around edges with a brush.
- Roll primer across the ceiling in overlapping passes.
- Let it dry fully before applying ceiling paint.
Use flat ceiling paint for a smooth, low-sheen finish that hides minor imperfections and blends the repair with the surrounding area.
Keep your strokes steady and maintain a wet edge to avoid lap marks.
If you’re working with the right tools and a careful pace, you’ll get a clean result that feels like it belongs.
When to Call a Ceiling Water Damage Pro
Call a ceiling water damage pro when the stain keeps spreading, the drywall feels soft or sagging, or you spot mold, active leaking, or electrical fixtures near the damage.
You shouldn’t wait, because hidden water damage can weaken framing, ruin insulation, and raise repair costs fast.
If the source isn’t obvious, if the area stays damp after cleanup, or if you notice bubbling paint, trust restoration professionals to inspect it. They can trace the leak, dry the structure, and prevent secondary damage you might miss.
When you call early, you protect your home and join other homeowners who handle problems before they grow. You’ll also get safer repairs, clearer next steps, and less stress.
Frequently Asked Questions
How Do I Tell if Ceiling Damage Is From Condensation or a Leak?
You can tell by patterns: condensation signs show on cold surfaces, in corners, or near vents; leak indicators include brown stains, bubbling paint, and worsening spots after rain. Check both, and you’ll narrow it fast.
Can Ceiling Water Damage Cause Mold Behind the Paint?
Yes—ceiling water damage can hide mold behind paint, like a quiet stain spreading in the dark. You’ll need mold prevention steps, fix the water damage fast, and inspect nearby surfaces for soft spots or odors.
How Long Should Drywall Dry Before Repairs Begin?
You should let drywall dry until moisture levels return to normal, usually 24–72 hours, before repairs begin. Check drying time with a moisture meter, and don’t patch until the area feels completely dry.
Will Ceiling Repairs Affect Nearby Electrical Fixtures?
Yes—ceiling repairs can affect nearby electrical fixtures, so you should protect them first. Like Achilles’ heel, one exposed wire can undo the job. You’ll need ceiling fixture safety checks and electrical code compliance to stay included.
What Permits Are Needed for Major Ceiling Damage Repairs?
You’ll usually need a building permit, and sometimes electrical or plumbing permits too. Check local permit requirements before starting major ceiling repairs, since approvals can affect your repair timeline and keep your project compliant.
Conclusion
By following these steps, you can turn a water-stained ceiling from a headache into a finished repair. Stop the leak, dry the area, and patch what’s damaged before it spreads like ink in paper. A clean prime and paint job can restore the room’s look and keep trouble from creeping back. If the damage is deep, sagging, or moldy, don’t push it—call a pro so your ceiling can stand strong again.