You wouldn’t believe it, but just last week, a neighbor faced a flooded home disaster. If you ever find yourself in a similar situation, knowing the right steps can make all the difference. From shutting off utilities to checking for mold, each action is vital for a safe recovery. Let’s explore these essential steps to help you restore your home effectively and efficiently, ensuring your space is livable once again.
Key Takeaways
- Shut off utilities like electricity and gas to prevent hazards before assessing the damage.
- Document all damage with detailed photographs for insurance claims and keep related receipts.
- Remove standing water using appropriate pumps and protective gear to ensure safety.
- Clean and disinfect affected areas thoroughly with EPA-approved solutions to eliminate contaminants.
- Consult restoration professionals for structural repairs and effective mold assessment and removal.
Shut Off Utilities to Prevent Further Issues
When your home floods, the first step is to shut off the utilities to prevent further issues. This means turning off the electricity, gas, and water supply. By doing this, you reduce the risk of electrical hazards and gas leaks, which can be dangerous.
If you’re unsure how to do this safely, consider contacting emergency services for assistance.
Once the utilities are off, document the situation for your insurance claim.
After the water recedes, you’ll need to arrange for utility reconnection; don’t rush this step. Make sure your home is safe before restoring power and water.
Assess the Damage and Safety Hazards
After shutting off your utilities, it’s essential to assess the damage to your home.
Look for structural risks, like sagging ceilings or warped walls, and check for any electrical hazards that could pose a danger.
Addressing these issues early can prevent further complications and ensure your safety.
Identify Structural Risks
To effectively address the aftermath of a flood, you need to identify structural risks that could pose safety hazards.
Start with a thorough risk assessment of your home’s structural integrity. Look for visible damage like cracks in walls, sagging ceilings, or uneven floors. These signs indicate compromised stability and should be taken seriously.
If you notice any of these issues, don’t hesitate to contact a professional for further evaluation. Remember, even minor damage can lead to significant problems down the line.
Prioritizing safety is essential, not just for you but for everyone who enters your home. By addressing these risks early, you’re ensuring a safer environment for you and your loved ones during the restoration process.
Check Electrical Hazards
As you assess the damage from flooding, it’s vital to check for electrical hazards that could pose serious risks. Start by ensuring the power is off at the main breaker to prevent shock.
Look for submerged outlets, wires, and appliances; these can lead to dangerous situations. Conduct a thorough circuit inspection to identify any damage.
If you notice frayed wires or corrosion, don’t hesitate to call a licensed electrician. Remember, electrical safety is important during the recovery process.
It’s better to be safe and take precautions than to face potential injuries. By addressing electrical hazards promptly, you can help protect your home and loved ones as you work towards restoring your space.
Document Damage for Insurance Claims
When you start the claims process, it’s essential to document all damage thoroughly.
Take detailed photographs of affected areas and items, as these will support your claim.
Additionally, keep all receipts organized to help demonstrate the costs associated with repairs and replacements.
Capture Detailed Photographs
Capturing detailed photographs of the damage is essential for your insurance claims process. Effective photography techniques can make a significant difference in your insurance documentation.
Here are some tips to ensure you cover all vital aspects:
Wide Shots: Capture entire rooms to show the extent of the damage.
Close-Ups: Focus on specific areas, like water stains or structural damage, for detailed evidence.
Before and After: If possible, include photos from before the flooding to highlight changes.
Date Stamps: Use timestamps on your photos to clearly document when the damage occurred.
Keep Receipts Organized
To ensure a smooth insurance claims process, you should keep all receipts related to the damage organized.
Start by creating a designated folder for receipt tracking. As you purchase supplies or hire contractors, promptly file each receipt to avoid losing important documents later.
Consider using digital tools or apps that can help with organized filing, making it easier to access your records when needed.
Don’t forget to categorize receipts by type or date, which will simplify the claims process. This way, when you’re ready to submit your claim, you’ll have everything in one place.
Staying organized eases your stress and helps you maximize your insurance benefits.
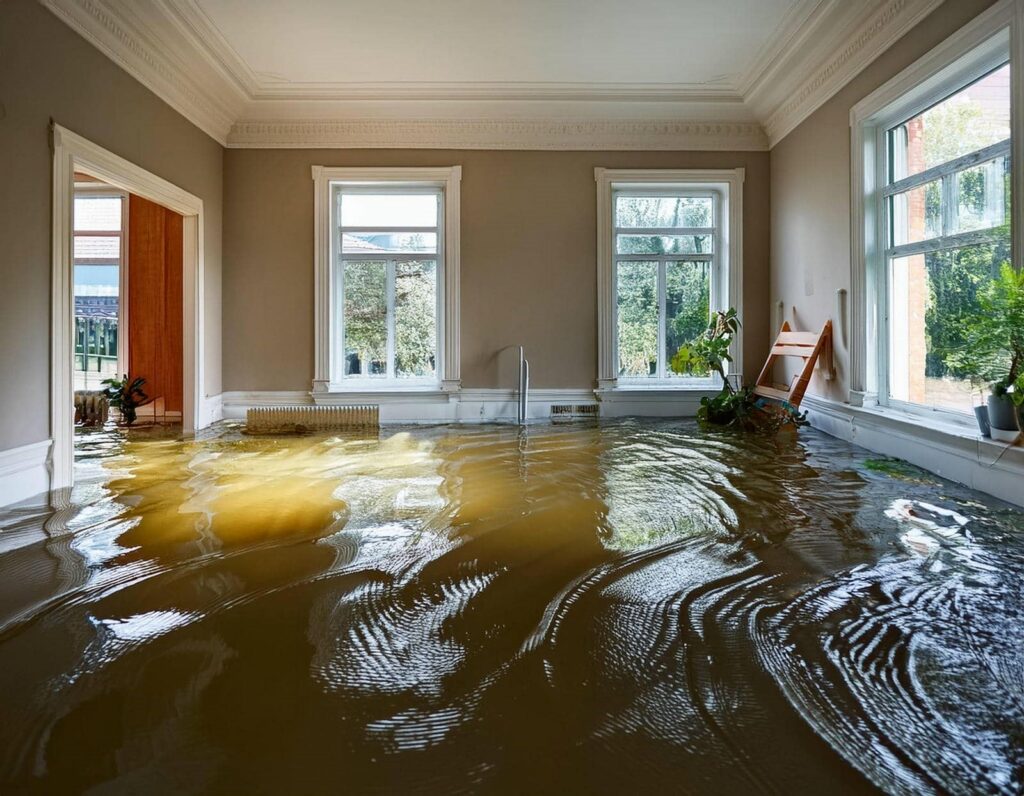
Remove Standing Water With Pumps and Buckets
Start by evaluating the amount of standing water in your home. This will help you decide which water removal techniques to use. Depending on the situation, you might need to combine pumps and buckets for effective removal.
Here are some pump types to weigh:
- Submersible Pumps: Great for deep water.
- Utility Pumps: Ideal for smaller areas and lighter water.
- Sump Pumps: Perfect for continuous drainage in basements.
- Manual Pumps: Useful for quick, smaller tasks.
After selecting the right pump, use buckets to tackle any remaining water.
Make sure you’re wearing protective gear to stay safe. By efficiently removing standing water, you’ll take a vital step towards restoring your home.
Dry Out Your Flooded Home With Fans and Dehumidifiers
Once you’ve removed the standing water, it’s time to dry out your home to prevent mold and further damage.
Start by strategically placing fans around the affected areas to enhance air circulation. Aim them towards walls and windows for maximum effect.
Adjust your dehumidifier settings to the appropriate level, typically around 30-60% humidity, to ensure effective moisture control.
Utilize drying techniques like opening windows for ventilation, but be mindful of outdoor humidity.
Regularly check humidity monitoring devices to track progress.
Remember safety precautions, such as making sure electrical outlets are dry before plugging in devices.
Clean and Disinfect Affected Areas Thoroughly
After drying out your home, it’s essential to clean and disinfect affected areas to eliminate harmful contaminants. Proper cleaning reduces health risks and improves air quality.
Here are some effective methods to follow:
Gather Cleaning Supplies: Use gloves, masks, and appropriate cleaning supplies to protect yourself.
Use Disinfecting Solutions: Apply EPA-approved disinfectants to surfaces, targeting areas prone to bacterial growth.
Implement Cleaning Techniques: Scrub surfaces thoroughly, making sure you reach corners and crevices, and focus on personal items that can harbor contaminants.
Follow Safety Precautions: Maintain good ventilation during cleaning to minimize inhalation of harmful substances, keeping your restoration timeline on track.
Remove Water-Damaged Materials and Furnishings
With the cleaning and disinfection complete, you can now focus on removing water-damaged materials and furnishings.
Start by evaluating your belongings—identify what can be salvaged and what needs to go. For items like carpets, padding, and upholstered furniture, it’s often best to think about furniture disposal, as these materials can trap moisture and lead to further damage.
If you find structural materials like drywall or insulation affected, remove and replace them promptly to avoid long-term issues.
Document everything for insurance purposes, and remember to take care when handling heavy items.
Once you’ve cleared out the damaged materials, you’ll make way for fresh replacements, helping you restore a safe and comfortable home environment.
Check for Mold and Take Action
Once you’ve addressed water-damaged materials, it’s essential to check for mold.
Look out for symptoms like musty odors or visible growth, as catching it early can save you headaches later.
We’ll explore safe removal methods and tips to prevent future mold growth in your home.
Identify Mold Symptoms Early
Identifying mold symptoms early is essential to preventing further damage in your flooded home. By staying vigilant, you can protect your space and loved ones. Here are some early symptoms to watch for:
Musty Odor: A persistent, damp smell can indicate mold growth.
Visible Mold: Look for dark spots or discoloration on walls, ceilings, and floors.
Allergic Reactions: Sneezing, coughing, or skin irritation may signal mold exposure.
Increased Humidity: High humidity levels can promote mold growth; consider using a dehumidifier.
Implementing mold prevention tips right away can help you manage these issues effectively.
Don’t wait until it’s too late; act quickly to ensure a safe and healthy living environment.
Safe Mold Removal Methods
To effectively tackle mold in your flooded home, you need to act quickly and follow safe removal methods.
Start by wearing protective gear—gloves, mask, and goggles—before you begin. Use natural cleaning solutions, like a vinegar-water mix, to scrub affected areas. This helps eliminate mold without harsh chemicals.
Don’t forget to ventilate the space; open windows and use fans to reduce moisture. For larger infestations, consider contacting professionals who specialize in mold removal.
After cleaning, implement mold prevention techniques, such as using dehumidifiers and ensuring proper drainage around your home.
Prevent Future Mold Growth
While you work on restoring your home, regularly checking for mold is essential to preventing future growth.
By implementing effective mold prevention techniques, you can safeguard your indoor air quality and create a healthier environment for you and your loved ones.
Here are four key steps to take:
Monitor Humidity Levels: Keep indoor humidity below 60% using dehumidifiers.
Inspect for Leaks: Regularly check plumbing and the roof for leaks and repair them immediately.
Improve Ventilation: Ensure proper airflow in areas like bathrooms and kitchens.
Clean and Dry: Quickly dry any wet items and clean surfaces regularly to reduce mold spores.
Repair Structural Damage and Replace Fixtures
After a flood, tackling structural damage and replacing fixtures is essential for restoring your home’s safety and functionality.
Start by evaluating the structural integrity of your walls, floors, and foundation. Look for signs of warping or cracks that could compromise stability. If you find significant damage, it’s vital to consult a professional to ensure repairs are done correctly.
Next, focus on fixture replacement. This includes anything from light fixtures to plumbing fixtures that may have been damaged.
Choose durable materials that can withstand future water exposure. By addressing these issues promptly, you enhance your home’s functionality and create a welcoming environment for your family.
Your home deserves to be safe and comfortable again.
Get Help From Restoration Professionals
When facing the aftermath of a flood, enlisting the help of restoration professionals can make a significant difference in your recovery process.
These experts offer essential restoration services that ensure your home returns to a safe and livable state.
Here are some key benefits of hiring professionals:
Emergency Response: They provide immediate assistance to mitigate damage.
Water Extraction: Professionals use advanced equipment to remove standing water efficiently.
Mold Assessment: Experts evaluate the potential for mold growth and take action to prevent it.
Insurance Guidance: They help you navigate your insurance claims, ensuring you maximize your coverage.
Frequently Asked Questions
How Long Does It Take to Fully Dry Out a Flooded Home?
It typically takes three to seven days to fully dry out a flooded home, depending on flood damage and drying techniques used. Using fans and dehumidifiers can speed up the process considerably, helping you reclaim your space.
What Should I Do if My Insurance Claim Is Denied?
If your insurance claim’s denied, gather your claim documentation, review the denial reasons, and file an insurance appeal. Stay organized, stay persistent, and reach out for help if you need it. You’re not alone.
Can I Stay in My Home During the Restoration Process?
You might need temporary housing during restoration due to safety concerns. Staying could increase emotional stress, especially if the timeline’s uncertain. Prioritize your well-being and consider relocating until the work’s completed for peace of mind.
What Personal Items Can Be Salvaged After Flooding?
You can often salvage personal items like family photos, especially if you act quickly. Dry them gently and avoid direct sunlight. Other salvaged belongings might include furniture, but make certain they’re free from mold and damage.
How Can I Prevent Future Flooding in My Home?
To prevent future flooding in your home, install effective drainage solutions like gutters and French drains. Regularly maintain these systems, and consider landscaping adjustments to redirect water away from your property. Stay proactive and protect your space.
Conclusion
Restoring your flooded home can feel overwhelming, but by taking timely, targeted actions, you can conquer the chaos. Remember, safety should always be your primary priority. Swiftly shut off utilities, assess damage, and document everything for insurance. Don’t hesitate to seek skilled specialists if needed. With determination and diligence, you’ll transform your troubled space into a safe, serene sanctuary once again. Embrace the journey, and reclaim your comfort!