
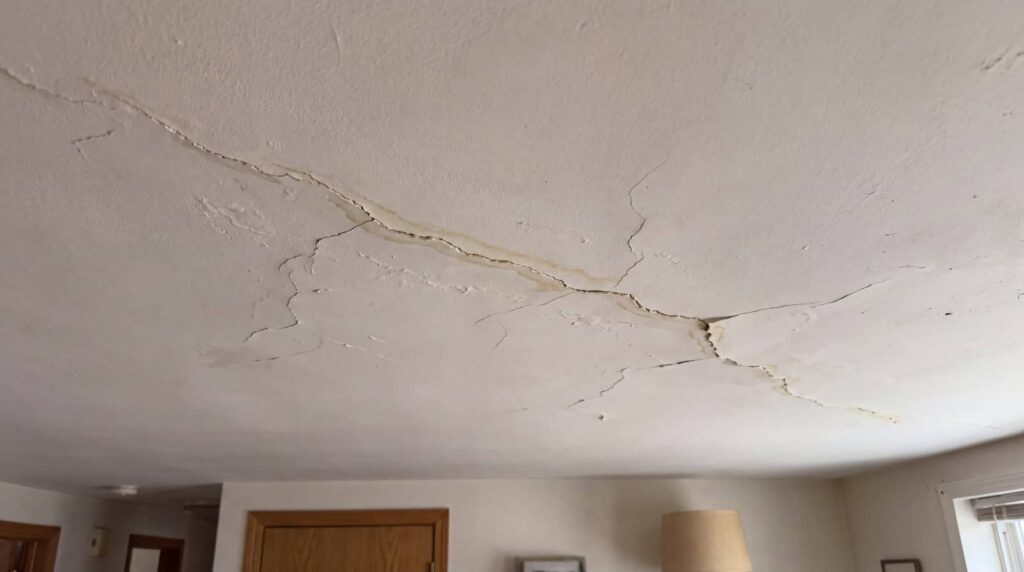
Key Takeaways
- Identify and Stop the Source: Quickly locate and address leaks to prevent further damage before initiating repairs.
- DIY Repairs: For minor damage, remove affected drywall sections and replace them with new materials, ensuring structural integrity.
- Mold Inspection: Check for mold growth within 24 to 48 hours post-damage; prompt removal is essential to ensure safety.
- Professional Help: For extensive damage or persistent leaks, hire a professional for thorough restoration and proper documentation for insurance claims.
- Preventive Measures: Regularly inspect roofs, plumbing, and gutters to mitigate the risk of future water damage to ceilings.
What Causes Ceiling Water Damage?
Water damage in your ceiling can often be traced back to a few common culprits. One major cause is leaky roofs. When shingles wear down or are damaged, water can seep in during rainstorms, leading to unsightly stains and potential mold growth.
Another frequent issue stems from plumbing problems. Burst pipes or faulty fixtures can cause water to accumulate, compromising your ceiling’s integrity.
If you’ve noticed water spots or peeling paint, it’s vital to identify the source quickly. Ignoring these signs can lead to more extensive damage and costly repairs down the line.
What to Do Right After Water Damage Hits
When disaster strikes and you discover water damage in your ceiling, your immediate response can make a significant difference.
First, prioritize safety—turn off the electricity in the affected area to prevent electrical hazards.
Next, identify the source of the water and stop it if possible; this is essential for effective emergency measures.
Act quickly to remove any valuable items or furniture from the vicinity to minimize damage.
Use towels or a wet/dry vacuum to absorb excess water.
Don’t forget to document everything with photos for insurance purposes.
Finally, reach out to professionals to assess the damage and discuss next steps.
Your prompt immediate actions can help safeguard your home and give you peace of mind during this stressful time.
Step-by-Step DIY Repairs for Ceiling Water Damage
Assess the damage to your ceiling before diving into repairs. Start with a thorough ceiling inspection to identify any mold, discoloration, or structural issues.
Once you’ve pinpointed the problem areas, gather your repair materials, like drywall, joint compound, and paint. If the damage is minor, cut out the affected section and replace it with new drywall.
For larger issues, you might need to reinforce the framing. After installing the new material, apply joint compound and sand it smooth.
Don’t forget to prime and paint for a seamless finish. Always take your time and verify everything is dry before moving on.
Following these steps helps restore your ceiling and gives you that sense of accomplishment as a homeowner.
When Should You Call a Professional for Water Damage?
After tackling minor ceiling repairs, you might find yourself wondering if it’s time to call in an expert.
If you notice persistent leaks or significant water damage, don’t hesitate. Mold growth can begin within 24 to 48 hours, posing health risks to you and your family.
Additionally, if the damage is extensive or affects structural elements, a professional should handle it. They’ll ensure proper restoration and help document the damage for insurance claims, which can be vital for financial support.
Trusting experts gives you peace of mind and ensures your home is safe and sound.
How to Prevent Future Ceiling Water Damage
To keep future ceiling water damage at bay, proactive measures are essential. Start by regularly inspecting your roof for any signs of wear or leaky roofs. If you notice missing shingles or water stains, address them immediately.
It’s also wise to check your plumbing systems for leaks; even minor plumbing issues can lead to significant damage over time. Make sure gutters are clean and free of debris, allowing water to flow freely away from your home.
Additionally, consider installing a moisture barrier in your attic and maintaining proper insulation. By taking these steps, you protect your ceiling and create a safer, more comfortable living space for you and your loved ones.
Frequently Asked Questions
How Can I Identify Hidden Water Damage in My Ceiling?
To identify hidden water damage in your ceiling, look for stains, peeling paint, or mold. Use moisture assessment tools for precise readings, and consider mold detection methods to ensure you address all potential issues effectively.
Will My Insurance Cover Ceiling Water Damage Repairs?
Yes, your insurance might cover ceiling water damage repairs, especially if you file timely insurance claims. To ensure coverage, review your policy details and focus on damage prevention to avoid future issues.
Can I Paint Over Water Damage Stains?
You can’t just slap paint over water damage stains; it’s like putting lipstick on a pig. Start with proper stain removal techniques, then use quality painting techniques to ensure a lasting, beautiful finish.
How Long Does It Take for Ceilings to Dry After Water Damage?
Ceilings usually take 24 to 48 hours to dry after water damage, depending on the moisture detection and drying techniques you use. Ensure proper ventilation and consider fans to speed up the drying process effectively.
What Materials Are Best for Ceiling Repairs?
For ceiling repairs, consider drywall or plaster for durability. Use water-resistant materials in humid areas. Employ proper repair techniques, like sealing joints and applying primer, to ensure a seamless finish that blends beautifully with your home.
Summary
So, while you might think a little ceiling water damage is just a minor inconvenience, it can lead to a waterfall of bigger issues if left unchecked. By taking proactive steps—like repairing damage and improving insulation—you’re not just fixing a ceiling; you’re fortifying your home against future deluges. Ironically, by addressing these small leaks, you’re saving yourself from a flood of headaches down the line. Stay ahead of the drip, and your ceiling will thank you!